I still remember the first time I attempted to set up a coffee cupping at home – it was a disaster. I had read all the blogs and watched all the videos, but nothing could have prepared me for the reality of how to set up a coffee cupping at home. The truth is, most of us have been misled into thinking that coffee cupping is some sort of mystical ritual that requires a plethora of expensive equipment and a PhD in coffee science. But let me tell you, it’s not about the gadgets or the jargon – it’s about understanding the fundamentals of coffee and being willing to experiment.
As someone who’s spent years perfecting the art of coffee cupping, I’m here to guide you through the process with practical advice and honest insights. In this article, I’ll walk you through the step-by-step process of how to set up a coffee cupping at home, from choosing the right coffee beans to brewing the perfect cup. I’ll share my own experiences, successes, and failures, and provide you with the tools you need to elevate your coffee game. By the end of this journey, you’ll be equipped with the knowledge and confidence to host your own coffee cupping sessions and discover the nuances of specialty coffee. So, let’s get started and uncover the secrets of coffee cupping together!
Table of Contents
Guide Overview: What You'll Need

Total Time: 1 hour 15 minutes
Estimated Cost: $20 – $40
Difficulty Level: Easy
Tools Required
- Scale (accurate to 0.1 grams)
- Grinder (burr grinder recommended)
- Kettle (for heating water)
- Spoon (for stirring)
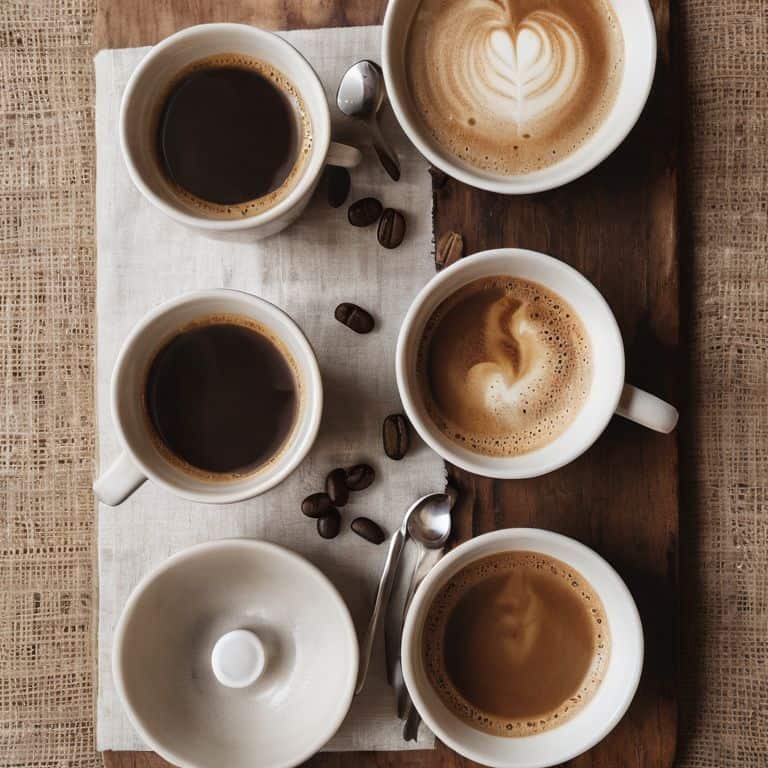
- Cupping bowls (6-8 bowls, each 6 inches in diameter)
Supplies & Materials
- Coffee beans (various origins and roast levels)
- Water (fresh and filtered)
- Coffee cupping evaluation sheets (for recording notes)
- Table or countertop (clear and stable surface, approximately 30 inches wide and 60 inches long)
Step-by-Step Instructions
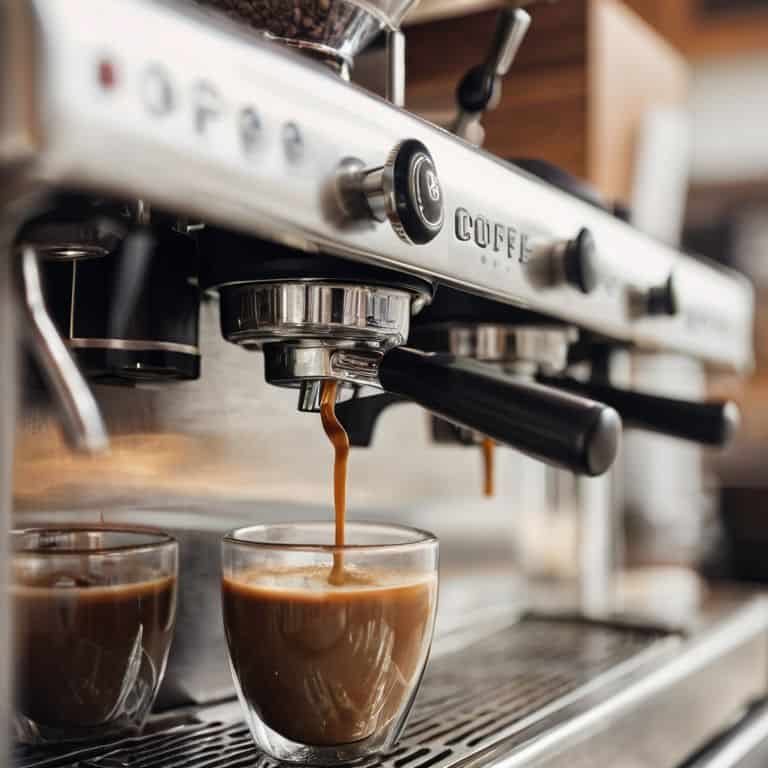
- 1. First, let’s get our tools in order. To set up a coffee cupping at home, you’ll need a few essential items: a scale, some decent cups (I recommend using ceramic or glass to avoid any flavors imparted by the material), a coffee grinder, and a kettle. Make sure your scale is accurate to the gram, as this will be crucial for measuring out the right amount of coffee for each cupping.
- 2. Next, we need to select our coffees. For a standard coffee cupping, you’ll want to choose 3-5 different coffees to compare. I like to mix it up with a variety of roast levels, processing methods, and origins to keep things interesting. When selecting your coffees, consider the flavor profiles you’re looking for – do you want bright and acidic, or smooth and chocolatey?
- 3. Now it’s time to prep our coffee. Measure out 12-13 grams of coffee for each cup, depending on the desired strength. I like to use a burr grinder to ensure a consistent grind size, which is crucial for even extraction. For cupping, we’re looking for a medium-coarse grind – think kosher salt.
- 4. While our coffee is ready, let’s heat up our water. The ideal temperature for cupping is between 93°C and 96°C, so get your kettle ready. I like to use a thermometer to ensure we’re hitting the exact temperature – it makes all the difference in the world. Use fresh, filtered water to prevent any impurities or odors from affecting the taste of the coffee.
- 5. With our water hot and our coffee ground, it’s time to start the cupping process. Place one cup on the table for each coffee, and add 200-210ml of water to each cup. Make sure to pour in a circular motion to evenly saturate all the grounds. I like to use a pouring technique that allows me to control the flow of water, ensuring that each cup gets the same amount.
- 6. Now we wait – this is the most crucial part of the cupping process. Allow the coffee to steep for exactly 4 minutes, then break the crust that forms on top by gently stirring it with a spoon. This is where the magic happens, and the flavors start to unravel. Take a moment to appreciate the aromas wafting from each cup – it’s a sensory experience like no other.
- 7. Finally, it’s time to taste and evaluate. Start by slurping the coffee to aerate it, then take a moment to consider the flavor, acidity, and body of each cup. Take notes, and don’t be afraid to go back and forth between cups to compare. I like to use a cupping scorecard to keep track of my thoughts and ratings – it helps to identify patterns and preferences.
How to Set Up a Coffee Cupping at Home
As I delve into the world of coffee cupping, I’m reminded of the importance of sensory evaluation of coffee. It’s not just about tasting the coffee, but also about understanding the nuances of each brew. To take your coffee cupping to the next level, consider investing in a coffee tasting notes template. This will help you record your observations and track the differences between each coffee. I’ve found that using a template helps me stay focused and ensures that I don’t miss any critical details.
When it comes to brewing coffee for cupping, home coffee roasting can be a game-changer. By roasting your own beans, you can control the level of roast and bring out the unique characteristics of each coffee. However, it’s crucial to pay attention to the coffee and water temperature guide, as this can significantly impact the flavor of your coffee. I’ve experimented with different temperature ranges and found that even small variations can make a big difference.
To get the most out of your coffee cupping experience, it’s essential to invest in the right equipment. I’ve reviewed various cupping coffee equipment and found that a good scale and some decent cups are essential. By using the right tools and following a coffee cupping protocol, you can ensure that your coffee is brewed to perfection and that you’re getting the most out of your tasting experience.
Brewing Truth Coffee Cupping Protocol
Now that we’ve got our setup in place, it’s time to dive into the protocol. For me, coffee cupping is a form of active meditation – it’s about being fully present with the coffee. I start by carefully pouring the same amount of hot water over each sample, making sure to hit the optimal temperature of between 93°C and 96°C. This is where the magic happens, and the true flavors of the coffee start to reveal themselves.
I take my time, allowing each sample to steep for exactly 4 minutes before breaking the crust. The aromas that rise from the cups are incredible, and I make a point to note the nuances of each one. It’s all about paying attention to the details – the grind size, the water chemistry, the ratio of coffee to water. These tiny variables can make all the difference in the world, and it’s what separates a good cup from a truly great one.
Sensory Evaluation Coffee Tasting Notes Template
To truly experience the nuances of each coffee, I rely on a sensory evaluation template. This includes assessing the coffee’s fragrance, flavor, acidity, body, and overall impression. I start by smelling the coffee, taking note of its aroma and any distinctive scents. Next, I taste, considering the flavor profile, acidity level, and mouthfeel.
My template also includes space to record the coffee’s sweetness, bitterness, and any defects. By using this structured approach, I can systematically evaluate each coffee and develop a deeper understanding of its characteristics. This process allows me to refine my palate and better appreciate the unique qualities of each coffee.
Elevating Your Home Cupping Game: 5 Expert Tips
- Start with a clean slate: Ensure all your equipment is thoroughly cleaned and rinsed to prevent any residual flavors from affecting your cupping experience
- Grind size matters: Experiment with different grind sizes to find the perfect balance for your cupping, as this can significantly impact the extraction and flavor profile
- Water, water, everywhere: Use fresh, filtered water for your cupping, and consider investing in a water quality testing kit to optimize your brewing water’s chemistry
- Temperature control is key: Invest in a thermometer to monitor your water temperature, as even slight deviations can alter the flavor and aroma of your coffee
- Record your journey: Keep a detailed journal of your cupping sessions, including notes on flavor profiles, aromas, and any variables you’ve tweaked, to track your progress and refine your palate
Key Takeaways for the Perfect Cup
Consistency is key: investing in a good scale and thermometer can make all the difference in your coffee cupping journey, allowing you to refine your technique and detect even the subtlest nuances in flavor
Water quality matters: using filtered water with a balanced mineral profile can elevate your coffee cupping experience, as impurities and excess minerals can significantly impact the taste and aroma of your brew
Practice mindful evaluation: taking the time to carefully assess the aroma, flavor, acidity, and body of each coffee, using a sensory evaluation template, can help you develop a deeper appreciation for the complexities of coffee and improve your palate over time
The Heart of Coffee Cupping
Setting up a coffee cupping at home isn’t just about following a checklist, it’s about cultivating a sensory awareness that allows you to connect with the coffee on a deeper level – to taste not just the flavors, but the story and craftsmanship behind each bean.
Julian Vale
Unlocking the Full Potential of Coffee Cupping at Home

As we’ve explored throughout this guide, setting up a coffee cupping at home requires attention to detail and a willingness to experiment. From precise measurements to sensory evaluation, each step plays a crucial role in unlocking the full flavor profile of your coffee. By following the coffee cupping protocol and using a coffee tasting notes template, you’ll be well on your way to developing a discerning palate and discovering new favorites. Whether you’re a casual coffee enthusiast or a serious aficionado, the art of coffee cupping offers a deeper connection to the craft and a greater appreciation for the nuances of each brew.
As you continue to refine your coffee cupping skills, remember that the pursuit of the perfect cup is a journey, not a destination. With each new coffee you taste and each technique you master, you’ll be drawn closer to the ultimate goal: a profound understanding of the intricate relationships between flavor, aroma, and technique. So don’t be afraid to push the boundaries of what’s possible, to experiment with new roasts and brewing methods, and to share your discoveries with others. For in the world of coffee cupping, the greatest reward is not just the perfect cup, but the community and camaraderie that comes with sharing a passion for the craft.
Frequently Asked Questions
What is the ideal water temperature for brewing coffee during a cupping session?
For me, the ideal water temperature for brewing coffee during a cupping session is between 93°C and 96°C. I’m obsessed with precision, so I aim for 94.5°C to bring out the optimal balance of flavors and acidity in the coffee. Anything outside this range can throw off the entire tasting experience.
How do I properly store and handle green coffee beans to ensure optimal flavor and aroma during the cupping?
Storing green coffee beans is a sacred trust – I keep mine in airtight containers, away from direct sunlight and moisture. A consistent temperature between 15-20°C is ideal. Handle them gently to prevent damage, and always use a clean scoop to minimize cross-contamination. This way, you’ll preserve the delicate flavors and aromas, ensuring a vibrant cupping experience.
What are some common mistakes to avoid when evaluating the sensory characteristics of coffee during a home cupping?
When evaluating coffee, I see home baristas make two crucial mistakes: not calibrating their palate and neglecting to control brewing variables. This leads to inconsistent tasting notes and unfair judgments. To avoid this, use a reference coffee and keep your brews precise, using the same equipment and technique each time.