I still remember the first time I attempted to create latte art – it was a disaster. The milk was too hot, the foam was too thick, and the design looked more like a blob than a beautiful leaf. But I didn’t give up. I practiced and experimented, determined to master the art of milk steaming and latte art. And that’s exactly what I want to share with you in this a guide to milk steaming and latte art. I’ve spent years perfecting my technique, and I’m excited to pass on my knowledge to you.
In this article, I’ll cut through the hype and give you honest, practical advice on how to create silky smooth microfoam and stunning latte art designs. You’ll learn the importance of temperature control, the right way to stretch and fold the milk, and the secrets to creating intricate designs that will impress even the most discerning coffee connoisseurs. Whether you’re a beginner or an experienced barista, this guide will help you take your skills to the next level and create beautiful, cafe-quality latte art that will make your friends and family jealous. So, let’s get started and unleash your inner artist!
Table of Contents
- Guide Overview: What You'll Need
- Step-by-Step Instructions
- A Guide to Milk Steaming and Latte Art
- Mastering the Craft: 5 Essential Tips for Milk Steaming and Latte Art
- Key Takeaways for Mastering Milk Steaming and Latte Art
- The Art of Milk and Design
- Mastering the Art of Milk Steaming and Latte Design
- Frequently Asked Questions
Guide Overview: What You'll Need
Total Time: 1 hour 15 minutes
Estimated Cost: $50 – $100
Difficulty Level: Intermediate
Tools Required
- Steam Wand on an espresso machine
- Thermometer for measuring milk temperature
- Pitcher for steaming and pouring milk
- Spoon or latte art tool for creating designs
Supplies & Materials
- Milk whole, skim, or a non-dairy alternative
- Espresso freshly pulled shots for latte art
- Sugar or sweetener optional for flavoring
Step-by-Step Instructions
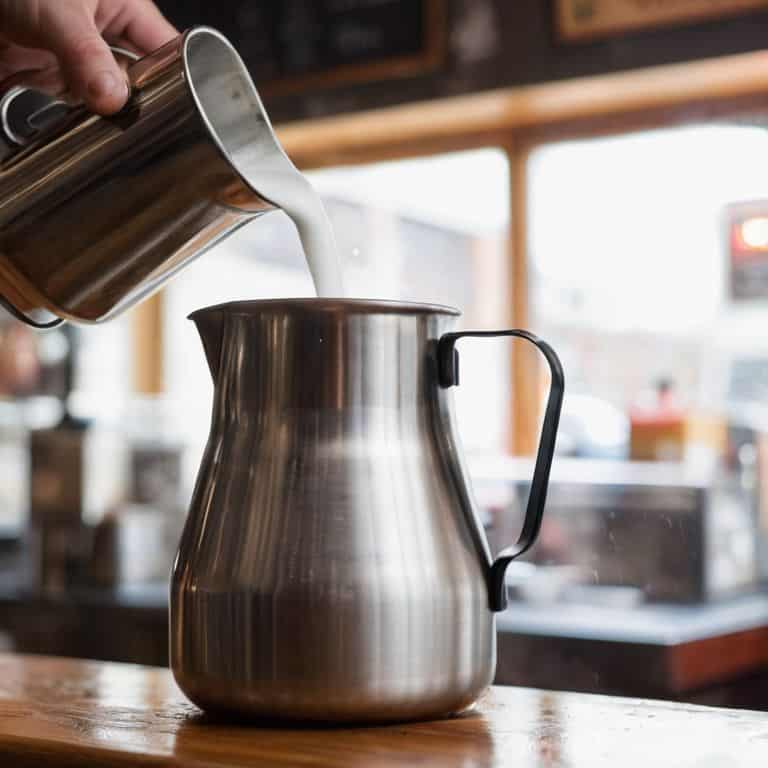
- 1. To start your milk steaming journey, you need to purge the steam wand by releasing a burst of steam into the air. This simple step removes any excess water that might be lurking inside, ensuring you’re starting with a clean slate. Next, submerge the steam wand into a pitcher of cold milk, making sure it’s fully immersed to prevent any unwanted aeration.
- 2. The next step is to turn on the steam, and here’s where things can get a bit tricky – you want to heat the milk to the ideal temperature, which is between 140°F and 160°F. Any higher, and you risk scalding the milk; any lower, and you won’t get the silky smooth microfoam you’re after. I like to think of this process as a delicate dance, where you’re constantly monitoring the temperature to find that sweet spot.
- 3. Now it’s time to stretch the milk, which involves holding the pitcher at an angle and inserting the steam wand just below the surface. This creates a whirlpool effect that helps to incorporate air and increase the volume of the milk. Be careful not to introduce too much air, as this can lead to a bubbly, unappealing texture.
- 4. As you continue to heat and stretch the milk, you’ll start to notice it thickening and becoming more velvety. This is where the magic happens, my friends! You want to aim for a smooth, glossy texture that’s similar to wet paint. To achieve this, you may need to adjust the steam pressure or the temperature of the milk.
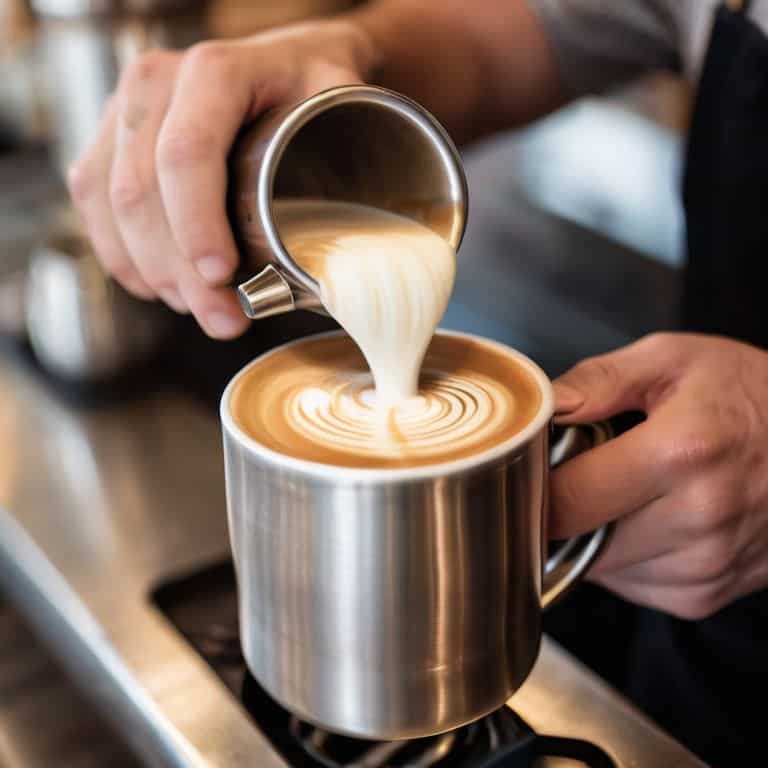
- 5. With your milk now perfectly steamed, it’s time to move on to the latte art. Start by holding the pitcher at a 45-degree angle, with the spout close to the surface of the coffee. This will allow you to create a smooth, flowing motion as you pour the milk into the cup.
- 6. As you pour, try to create a steady flow of milk, moving the pitcher in a gentle, sweeping motion. This will help you to create a uniform layer of foam on top of the coffee, which is essential for creating intricate designs. Remember to keep your movements smooth and deliberate, as any sudden jerks or movements can disrupt the flow of the milk.
- 7. Finally, it’s time to add the finishing touches to your latte art. Use a steady hand and a keen eye to create intricate patterns and designs on the surface of the coffee. This can be as simple as a heart or a leaf, or as complex as a delicate rosetta. Whatever design you choose, remember to have fun and experiment with different techniques until you find what works best for you.
A Guide to Milk Steaming and Latte Art
As I delve deeper into the world of milk steaming and latte art, I’m reminded of the importance of temperature control for steaming milk. It’s a crucial factor that can make or break the quality of your microfoam. I’ve seen many baristas struggle with this aspect, but with the right techniques and equipment, it’s definitely achievable. For instance, using a thermometer to monitor the temperature of your steaming milk can help you reach the optimal range of 140°F to 160°F.
When it comes to texturing milk for microfoam, it’s all about finding the right balance between silky smoothness and creamy texture. I recommend experimenting with different types of milk and steaming milk techniques to find what works best for you. Don’t be afraid to try out new methods and adjust your approach as needed. Remember, practice makes perfect, and the key to mastering latte art is to develop muscle memory through repetition.
To take your latte art game to the next level, consider investing in one of the best milk frothing pitchers on the market. These pitchers are designed to help you create a smooth, even flow of milk, making it easier to craft intricate designs. You can also find latte art design inspiration online or through barista training courses, which can help you stay up-to-date with the latest trends and techniques in the industry.
Elevating Designs Latte Art Design Inspiration
As I pour steamed milk into a cup, I see it as a canvas waiting for art. Latte art design inspiration can come from anywhere – nature, architecture, or even abstract concepts. I find myself drawn to the simplicity of a well-crafted heart or the elegance of a rosetta. The key to mastering these designs is to understand the flow of milk and how it interacts with the coffee’s surface tension. With practice, you’ll develop the touch and intuition needed to create stunning patterns that elevate your coffee creations.
For me, the pursuit of latte art is a meditative process, requiring focus and patience. I encourage you to experiment with different designs, from basic to intricate, and find what works best for you. Remember, it’s not just about the visual appeal, but also about the joy of creation and the satisfaction of presenting a beautifully crafted cup to someone.
Unleashing the Artist Steaming Milk Techniques
To truly unleash the artist within, you need to master the fundamentals of steaming milk. It’s not just about frothing milk, it’s about creating a velvety microfoam that’s essential for latte art. I always say, the key to perfect microfoam is in the stretching and folding of the milk. You want to introduce just the right amount of air to create a smooth, silky texture that will hold its shape when poured.
I recommend starting with cold milk and a clean steam wand, then purging the wand to remove any excess water. Next, submerge the wand just below the surface and turn on the steam, holding the pitcher at an angle to create a whirlpool effect. This is where the magic happens, and with practice, you’ll be able to craft the perfect canvas for your latte art.
Mastering the Craft: 5 Essential Tips for Milk Steaming and Latte Art
- Use the right type of milk: Experiment with different types of milk to find the one that works best for you, whether it’s whole, skim, or a non-dairy alternative
- Pay attention to temperature: Heat your milk to the optimal temperature range of 140°F to 160°F for a silky smooth microfoam
- Stretch and fold with intention: Develop a consistent stretching and folding technique to create a smooth, even texture in your microfoam
- Practice, practice, practice: Latte art is all about muscle memory, so don’t be discouraged if it takes time to develop your skills – keep trying until you get it just right
- Cleanliness is key: Make sure your steaming pitcher and equipment are spotless and free of any residual milk or water to prevent contamination and ensure the best flavor and texture
Key Takeaways for Mastering Milk Steaming and Latte Art
Practice deliberate temperature control and texture manipulation to achieve a silky smooth microfoam that’s the foundation of latte art
Experiment with different pouring techniques and ratios of espresso to milk to find your unique style and voice in latte art designs
Invest in quality equipment, such as a precision thermometer and a well-maintained steam wand, to elevate your milk steaming and latte art game
The Art of Milk and Design
Milk steaming and latte art are not mere accompaniments to a great cup of coffee, but an harmonious marriage of texture, flavor, and visual poetry – where every swirl, every pour, and every delicate design element converges to elevate the sensory experience.
Julian Vale
Mastering the Art of Milk Steaming and Latte Design

As we conclude this journey through the world of milk steaming and latte art, it’s essential to reiterate the fundamentals: temperature control, steam wand technique, and a deep understanding of milk textures are all crucial elements in creating that perfect, velvety microfoam. By mastering these skills and practicing with patience, you’ll be well on your way to crafting beautiful latte art designs that not only please the eye but also elevate the entire coffee experience. Remember, the key to success lies in the details, from the initial purge of the steam wand to the final delicate strokes of your design.
As you continue to hone your skills, always keep in mind that the pursuit of the perfect cup is a lifelong journey, filled with moments of triumph and setbacks. But it’s in these moments, with every carefully crafted sip, that we find the true essence of our passion for coffee. So, don’t be afraid to experiment, to push the boundaries of what’s possible with milk and coffee, and to share your creations with others. For in the end, it’s this shared passion that unites us all in the quest for the ultimate coffee experience.
Frequently Asked Questions
What's the ideal temperature for steaming milk to create a perfect microfoam?
For me, the sweet spot is between 140°F and 150°F. Any higher, and you risk scorching the milk; any lower, and it won’t hold its shape. I’m talking microfoam that’s silky, smooth, and stable – the perfect canvas for your latte art masterpiece. Trust me, the difference is palpable, and your taste buds will thank you.
How do I achieve consistent latte art designs without over-aerating the milk?
To achieve consistent latte art designs, I emphasize the importance of precise milk temperature and texture. Aim for a microfoam temperature between 140°F and 160°F, and adjust your steaming time to reach the perfect balance of creaminess and pourability. This will help you avoid over-aeration and create a smooth canvas for your designs.
Can I use any type of milk for latte art, or are there specific types that work better than others?
When it comes to latte art, not all milks are created equal. I swear by whole milk for its silky texture and forgiving nature, but you can also experiment with non-dairy alternatives like almond or soy milk. Just be aware that these may require adjustments to temperature and steaming time to achieve the perfect microfoam.