
I still remember the first time I struggled to create perfect microfoam for latte art – it was like trying to grasp a handful of water, only to have it slip right through my fingers. The common myth is that getting perfect microfoam is all about having the right equipment, but I’m here to tell you that’s only half the story. The real secret to mastering how to get perfect microfoam for latte art lies in the technique, and I’m excited to share my journey with you.
As a certified barista champion, I’ve spent years honing my skills and experimenting with different methods to achieve that elusive, velvety texture. In this article, I’ll cut through the noise and share my no-nonsense advice on how to get perfect microfoam for latte art. You’ll learn the essential tips and tricks to create stunning latte art, from understanding the importance of steam wand technique to mastering the ideal milk-to-air ratio. By the end of this guide, you’ll be well on your way to crafting beautiful, cafe-quality designs that will impress even the most discerning coffee connoisseurs.
Table of Contents
Guide Overview: What You'll Need

Total Time: 30 minutes to 1 hour
Estimated Cost: $50 – $100
Difficulty Level: Intermediate
Tools Required
- Steam Wand on an espresso machine
- Thermometer for monitoring temperature
- Pitcher or Jug for steaming and stretching milk
Supplies & Materials
- Milk whole milk or a non-dairy alternative
- Espresso Machine with a steam wand capability
- Latte Art Tools such as a thermometer and a steam wand tip
Step-by-Step Instructions
- 1. First, let’s start with the foundation of perfect microfoam: clean equipment. I’m obsessed with ensuring my steam wand and milk pitcher are spotless, as any residual milk or water spots can affect the texture and consistency of my microfoam. Give your equipment a thorough rinse and dry before proceeding.
- 2. Next, we need to select the right type of milk for our latte art. I personally prefer whole milk for its rich flavor and creamy texture, but feel free to experiment with skim or non-dairy alternatives to find your perfect match. The key is to find a milk that holds its shape and texture when steamed.
- 3. Now it’s time to purge the steam wand. This is a crucial step that many baristas overlook, but trust me, it’s essential for eliminating any excess water that can dilute our microfoam. Simply place a cloth or towel under the steam wand and open the valve for a few seconds to release any built-up water.
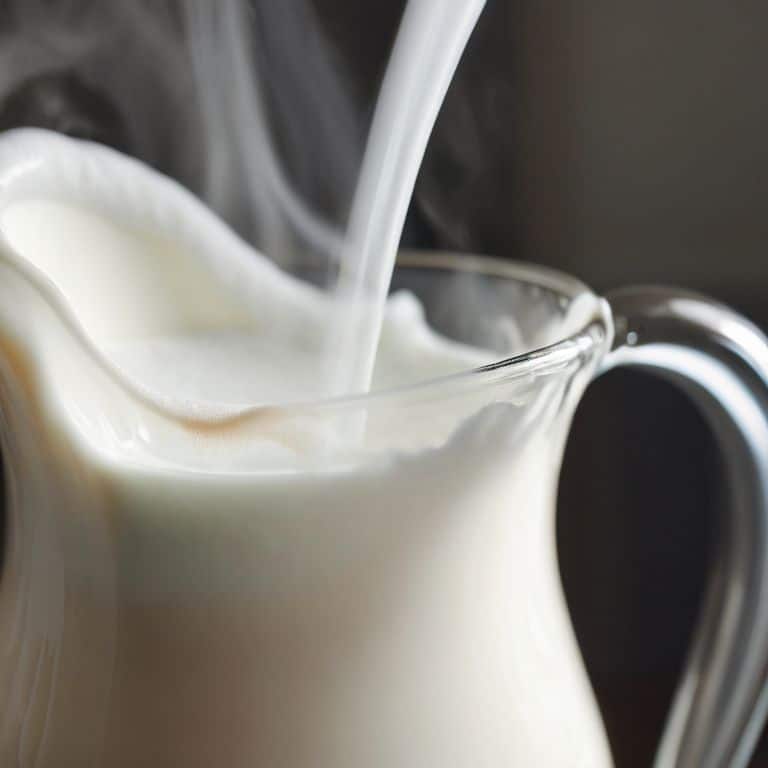
- 4. With our equipment clean and our milk selected, it’s time to start steaming. I like to think of this step as a waltz between the steam wand and the milk – we need to find that perfect harmony between temperature, texture, and flow. Submerge the steam wand just below the surface of the milk and start to heat it to around 140-150°F (60-65°C).
- 5. As we steam the milk, we need to create a smooth, silky texture. To achieve this, I recommend using a gentle, sweeping motion with the steam wand, holding it at an angle to create a whirlpool effect in the milk. This will help to incorporate air and create a smooth, even consistency.
- 6. Now we need to stretch the milk to the perfect temperature and texture for latte art. I like to think of this step as tempering the milk – we need to find that sweet spot where it’s hot, but not too hot, and still holds its shape. Aim for a temperature of around 160-170°F (71-77°C) and a texture that’s smooth, creamy, and just slightly thickened.
- 7. With our milk steamed and stretched to perfection, it’s time to create our microfoam. This is where the magic happens, and we get to see our hard work come together in a beautiful, velvety foam. Hold the steam wand just below the surface of the milk and create a gentle, pulsing motion to incorporate air and create a smooth, even foam.
- 8. Finally, it’s time to pour our microfoam into our coffee and create our latte art masterpiece. I like to think of this step as the moment of truth – all our hard work and attention to detail come together in a beautiful, delicate design. Take your time, be patient, and remember to have fun – after all, latte art is all about creativity and self-expression.
Mastering Microfoam
As I delve deeper into the world of microfoam, I’ve come to realize that steaming milk to microfoam consistency is an art that requires patience and practice. It’s not just about frothing milk, but about understanding the intricacies of temperature and texture. I’ve found that using cold milk is essential for creating a smooth and silky microfoam, as it allows for a more stable foam structure.
When it comes to creating intricate latte art designs, stretching milk is a crucial step. By carefully pouring the steamed milk into the coffee, you can create a delicate balance of textures and patterns. However, this process can be fragile, and even the slightest mistake can disrupt the entire design. To avoid this, I always make sure to purge steam wands for better foam, as any residual water can affect the quality of the microfoam.
To achieve the perfect microfoam, it’s essential to pay attention to the microfoam texture and stability tips. A good microfoam should be smooth, creamy, and have a delicate sheen to it. If you find that your microfoam is too thick or too thin, don’t worry – it’s all part of the learning process. By experimenting with different temperatures and techniques, you’ll eventually find the sweet spot that works for you. And when you do, the sense of satisfaction is unbeatable.
Steaming Milk to Perfection
To truly master microfoam, you need to understand the art of steaming milk to perfection. It’s all about finding that delicate balance between temperature, texture, and aeration. I’m meticulous about purging the steam wand before each use, ensuring a clean slate for my milk. As I steam, I listen for the subtle pitch change, a sign that the milk is reaching its ideal temperature – between 140°F and 160°F.
With the temperature just right, I focus on introducing the perfect amount of air, creating a silky, smooth microfoam that’s essential for latte art. It’s a dance of sorts, one that requires patience, practice, and a deep understanding of the nuances involved. By paying attention to these details, you’ll be well on your way to crafting microfoam that’s nothing short of sublime.
Troubleshooting Foam Texture Issues
When I’m guiding baristas, I often see foam texture issues arise from improper steaming techniques. If your microfoam is too thick or too thin, it’s likely due to the temperature or steaming time. I recommend adjusting your steaming time in 0.5-second increments to find the sweet spot. Additionally, pay attention to the sound of the steam wand – a smooth, gentle hiss indicates perfect integration of air and milk.
To troubleshoot, try changing your steaming pitch or adjusting the steamer’s depth in the milk. These subtle tweaks can make all the difference in achieving silky, velvety microfoam. Remember, it’s all about harmony and balance – the perfect union of steam, air, and milk. By fine-tuning these variables, you’ll be well on your way to crafting sublime microfoam that elevates your latte art to new heights.
Unlocking the Secrets to Sublime Microfoam: 5 Essential Tips
- Use the right milk: I only use whole milk with a fat content of at least 3.5% for latte art, as it provides the best balance between stretch and hold
- Purge the steam wand: Before steaming, always purge the wand to remove any excess water, ensuring you’re only introducing pure steam into your milk
- Stretch and fold with precision: Pay attention to the sound of the steam – you want a smooth, even hiss, and then fold the milk gently to create a seamless integration of air and liquid
- Monitor the temperature: Aim for a temperature range of 140°F to 160°F, as this is the sweet spot where the milk proteins stabilize and the foam becomes silky smooth
- Practice, practice, practice: Getting perfect microfoam is all about muscle memory and developing a sense of how the milk responds to steam, so don’t be discouraged if it takes time to get it just right
Unlocking the Secrets to Perfect Microfoam: Key Takeaways
Precision temperature control is crucial for achieving optimal microfoam, with the ideal steaming temperature ranging between 140°F to 160°F
Mastering the art of stretching and folding the milk is vital for creating a smooth, silky microfoam, and it’s all about finding that perfect balance between air and liquid
Regularly cleaning and maintaining your steam wand, as well as using high-quality milk, are often overlooked but essential steps in ensuring consistent, cafe-quality microfoam for latte art
The Pursuit of Perfection
Perfect microfoam is not just about technique, it’s about understanding the symphony of steam, milk, and temperature – when you master this harmony, every latte becomes a masterpiece.
Julian Vale
Unlocking the Art of Perfect Microfoam

As we’ve explored the world of microfoam together, I hope you’ve gained a deeper understanding of the intricacies of steam and milk. From the initial steps of purging and stretching, to the nuances of temperature control and texturing, each element plays a crucial role in achieving that perfect, velvety microfoam. By mastering the techniques outlined in this guide, you’ll be well on your way to creating stunning latte art that rivals even the most skilled baristas. Remember, practice is key, so don’t be discouraged if it takes time to develop your skills – the journey to microfoam mastery is just as important as the destination.
As you continue to hone your craft, I encourage you to embrace the artistic freedom that comes with creating microfoam. Experiment with different roasts, flavors, and designs to make each cup a unique reflection of your personality and style. The pursuit of the perfect microfoam is a lifelong journey, and one that requires patience, dedication, and a willingness to push the boundaries of what’s possible. So, go ahead, grab your steam wand, and unlock the full potential of your coffee – the world of latte art is waiting for you!
Frequently Asked Questions
What's the ideal temperature for steaming milk to achieve perfect microfoam for latte art?
For me, the ideal temperature for steaming milk is between 140°F and 150°F. Any higher, and you risk scalding the milk, while lower temps won’t provide enough energy to create silky microfoam. I aim for 145°F – it’s the sweet spot where the milk proteins and fats come together in perfect harmony, yielding a smooth, velvety texture that’s essential for latte art mastery.
How do I adjust the steam wand's position and angle to create a smooth, silky texture?
For silky microfoam, I adjust the steam wand to just barely break the milk’s surface, holding it at a 10-15 degree angle. This subtle dance of steam and milk creates a smooth, velvety texture. Experiment with tiny adjustments – it’s all about finding that sweet spot where the steam infuses the milk with just the right amount of air and heat.
Can I use any type of milk to create microfoam, or are there specific types that work better for latte art?
While you can use various milks, I swear by whole milk for latte art – its fat content and protein structure create the perfect microfoam. Skim milk and non-dairy alternatives can work, but they require more finesse. I’ve experimented with oat and almond milk, and with the right technique, they can produce stunning results, but whole milk remains my go-to for that velvety texture.


