I still remember the first time I attempted to create a heart shape in latte art – it was a disaster. I had been practicing for weeks, but my designs looked more like blobs than beautiful hearts. That’s when I realized that mastering the basic heart shape is not just about aesthetics, but about understanding the fundamentals of latte art. If you’re looking for a reliable guide to the basic heart shape in latte art, you’re in the right place. I’ve spent years perfecting my craft, and I’m excited to share my knowledge with you.
As a certified barista trainer, I’ve seen many aspiring artists struggle with creating consistent, high-quality designs. In this article, I’ll cut through the noise and provide you with practical advice on how to nail the basic heart shape. You’ll learn the essential techniques, from steaming the perfect microfoam to pouring with precision and control. By the end of this guide, you’ll be well on your way to creating stunning latte art that will impress even the most discerning coffee connoisseurs. So, let’s get started and dive into the world of latte art, where creativity meets technique.
Table of Contents
Guide Overview: What You'll Need

Total Time: 30 minutes to 1 hour
Estimated Cost: $10 – $20
Difficulty Level: Easy
Tools Required
- Steam Wand on an espresso machine
- Pitcher or Jug for steaming and pouring milk
- Thermometer for monitoring milk temperature
- Spoon or Tool for holding back foam while pouring
Supplies & Materials
- Espresso Machine
- Milk whole milk or a non-dairy alternative
- Ceramic or Glass Cup at least 6 inches in diameter
Step-by-Step Instructions
- 1. First, get your equipment in check: you’ll need a steady hand, a steam wand, and a pitcher of perfectly heated and textured milk. I like to use a thermos to keep my milk at the ideal temperature, between 140°F and 160°F, for the best microfoam.
- 2. Next, purge your steam wand to remove any excess water and to ensure you’re starting with a clean slate. This step is crucial, as any residual water can affect the quality of your microfoam and, in turn, your latte art. I always make sure to purge my wand for about 2-3 seconds before steaming my milk.
- 3. Now, submerge the steam wand into the milk, holding the pitcher at an angle to create a whirlpool effect. This helps to incorporate air and to evenly heat the milk. As you’re doing this, listen for the sound of the steam wand – you want to hear a smooth, consistent hiss, which indicates that you’re introducing air at the right rate.
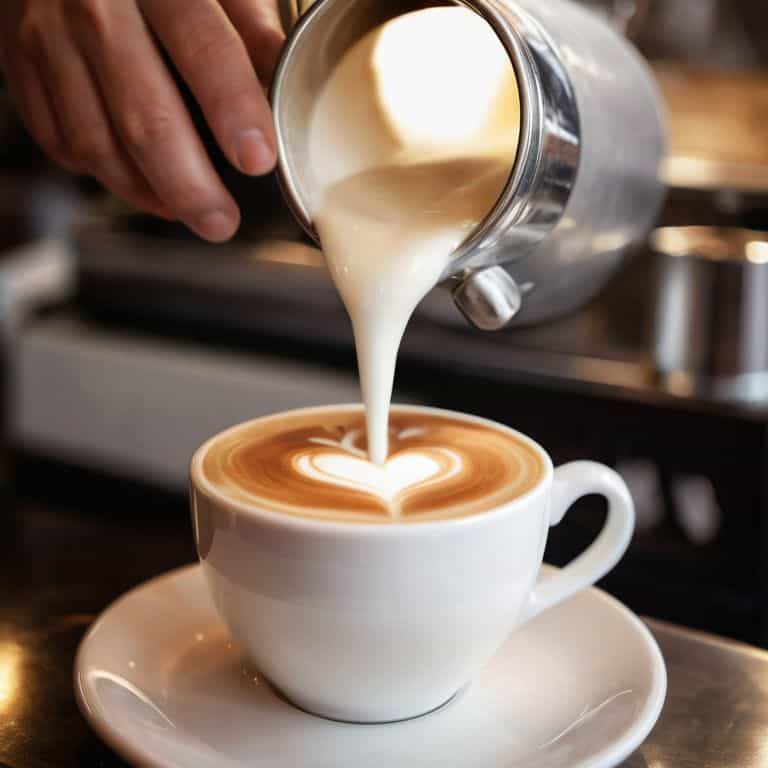
- 4. With your milk now heated and textured, it’s time to create the foundation of your heart shape. Pour a small amount of milk into the center of your espresso, holding the pitcher close to the surface to prevent the milk from spreading too much. This initial pour should be smooth and steady, setting the stage for your design.
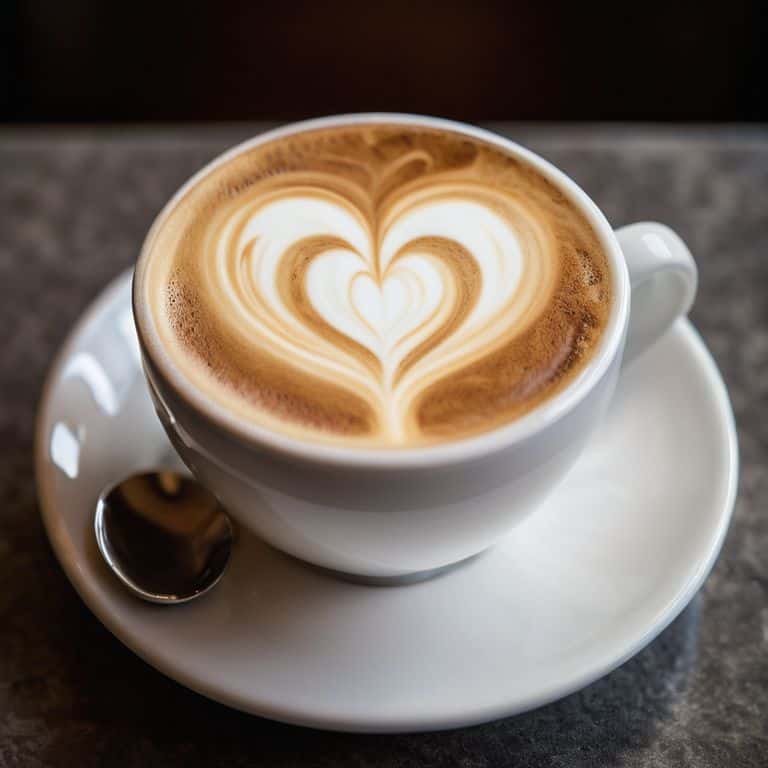
- 5. To craft the heart shape, hold the pitcher slightly above the surface of the coffee, and pour in a steady, flowing motion. Start at the top of the heart, moving the pitcher in a smooth, curved motion to create the edges of the heart. Remember to keep your pour steady and controlled, as any wobbles or hesitations can ruin the design.
- 6. As you’re pouring, pay attention to the flow: you want the milk to flow smoothly and consistently, creating a clear, defined shape. If the flow becomes too slow or too fast, adjust your pouring speed accordingly. I like to think of this step as a dance between the milk and the coffee, where every movement counts.
- 7. Finally, seal the deal by creating the bottom point of the heart. This is often the trickiest part, as it requires a delicate touch to avoid disrupting the rest of the design. To do this, simply flick your wrist in a gentle, downward motion, allowing the milk to flow smoothly and create a clean, pointed edge. With practice, this final step will become second nature, and you’ll be creating perfect heart shapes in no time.
A Guide to Basic Heart Latte Art

As I delve deeper into the world of latte art, I’ve come to realize that steaming milk for latte art is an art form in itself. It’s essential to create a smooth, silky microfoam that can hold its shape and allow for precise pouring. To achieve this, I recommend using a combination of whole milk and a touch of non-fat milk to create a stable foam. When it comes to pouring, heart design pouring techniques require a steady hand and a bit of practice to master.
One of the most common mistakes I see beginners make is over-aerating the milk, which can lead to a weak, bubbly foam. To avoid this, make sure to purge the steam wand before steaming and use a thermometer to monitor the temperature. Creating microfoam for latte art is all about finding the perfect balance between texture and temperature. With a little patience and practice, you’ll be well on your way to crafting beautiful, intricate designs.
For those just starting out, I recommend investing in some beginner friendly latte art tools, such as a steaming pitcher with a built-in thermometer and a pouring jug with a spout. These tools will help you develop the skills and confidence you need to take your latte art to the next level. Remember, practice is key, so don’t be discouraged if your early attempts don’t turn out as expected. With time and dedication, you’ll be creating stunning latte art designs that will impress even the most discerning coffee connoisseurs.
Heart Design Pouring Techniques
To pour a perfect heart, you need to master the flow. It’s all about speed and control – too fast and you’ll lose the definition, too slow and it’ll be a blob. I like to think of it as a gentle dance, where the steamed milk flows effortlessly into the cup. Hold the pitcher close to the surface and pour in a smooth, continuous motion. Aim for the center of the cup, letting the milk flow in a circular pattern to create the heart’s foundation.
As you pour, focus on creating a balance between the flow rate and the distance from the cup. This is where practice comes in – you’ll develop a sense of how much milk to pour and when to stop. Remember, it’s all about finesse, not force. With time and patience, you’ll be pouring hearts like a pro, and it’s a truly meditative process.
Steaming Milk for Perfect Hearts
To create the perfect heart, you need milk that’s silky smooth and hot, but not scalding. I’m talking about a microfoam that’s so velvety, it’s like painting with liquid gold. For me, the ideal temperature is between 140°F and 150°F – anything above that, and you’ll end up with a burnt offering. When steaming, I aim for a stretchy, glossy texture that holds its shape, but still flows effortlessly off the steam wand.
Get this right, and your heart design will be crisp and defined. I like to think of it as the foundation of a masterpiece – without it, the whole thing falls apart. So, take your time, and don’t be afraid to experiment until you find that sweet spot. Trust me, the difference is worth it.
5 Essential Tips to Master the Basic Heart Shape in Latte Art
- Use the right milk texture: it’s all about achieving a microfoam that’s silky smooth, yet holds its shape – I’m talking 3-4 seconds of pour time, no more, no less
- Temperature control is key: your steamed milk should be around 140°F to 150°F, any hotter and you’ll end up with a sad, flat heart
- Pouring technique is an art: hold the pitcher at an angle, and let the milk flow in a smooth, consistent stream – think of it as a meditation, where every movement counts
- Free pour or use a template: as a beginner, don’t be afraid to use a stencil or guide to help you get the hang of it, but once you’ve mastered the basics, it’s time to let your creativity shine
- Practice, practice, practice: it takes time and patience to develop the muscle memory and technique required to create perfect heart shapes – so don’t get discouraged if it doesn’t come out right at first, just keep at it
Key Takeaways for Mastering the Heart Shape in Latte Art
To achieve a perfect heart shape, it’s crucial to steam your milk to the ideal microfoam consistency, which is around 3-4% fat content and a temperature of 140°F to 160°F
The pouring technique is just as vital, requiring a steady hand and a smooth flow to create a symmetrical heart design – practice makes perfect, so don’t be discouraged if it takes a few tries to get it right
Remember, the foundation of great latte art is in the details: from the quality of your espresso shot to the texture of your steamed milk, every element plays a role in creating a stunning heart shape that will elevate your coffee game to the next level
The Heart of Latte Art
Mastering the basic heart shape is not just about aesthetics; it’s about understanding the harmony between milk and coffee, and the subtle dance of textures and temperatures that elevate a drink from ordinary to sublime.
Julian Vale
Mastering the Heart of Latte Art

As we conclude this journey to create the perfect heart shape in latte art, let’s reflect on the basics: we’ve covered the fundamental steps, from steaming milk to pouring techniques. It’s crucial to remember that practice is key, and mastering the heart design is just the beginning of your latte art journey. Don’t be discouraged if your first attempts don’t turn out as expected – it’s all about refining your skills and developing a keen eye for detail. With time and patience, you’ll be crafting beautiful hearts that will elevate your coffee creations to the next level.
Now, as you continue to hone your craft, remember that the pursuit of the perfect latte art is a never-ending journey. It’s about experimentation, innovation, and pushing the boundaries of what’s possible with milk and coffee. Don’t be afraid to try new techniques, to fail, and to learn from your mistakes. With dedication and passion, you’ll not only master the heart shape but also unlock a world of creative possibilities that will set your coffee apart and make every sip a truly special experience.
Frequently Asked Questions
What's the ideal milk texture for creating a stable heart shape in latte art?
For a stable heart shape, you want milk that’s silky smooth and holds its shape. I’m talking about a microfoam with a texture that’s similar to whipped cream, but still pours like liquid. Aim for a temperature between 140°F and 150°F, and a consistency that’s thick enough to hold a clear edge, but still flows effortlessly off the pitcher.
How do I adjust my pouring technique to achieve a symmetrical heart design?
To achieve a symmetrical heart, focus on pouring in a smooth, continuous motion, holding the pitcher close to the surface. Aim for a steady flow, about 1-2 mm from the surface, and pour in a gentle, sweeping curve, using the espresso machine’s spout as a guide to center your pour.
Can I use any type of milk to create latte art hearts, or are there specific types that work better?
When it comes to creating latte art hearts, not all milks are created equal. I swear by whole milk or a non-dairy alternative with a high fat content, like oat or almond milk. The creamier the milk, the better it holds its shape and allows for smooth, velvety pours – essential for nailing that perfect heart design.


