I still remember the first time I attempted to pour a latte art heart – it was a disaster. The milk was too hot, the pour was too slow, and the design looked more like a blob than a work of art. But I was determined to master the technique, and after months of practice, I finally got it just right. Now, I’m excited to share my knowledge with you in this a guide to pouring a latte art heart, so you can avoid the frustrations I faced and create beautiful designs with ease.
As you read this article, you can expect to learn the essential skills required to pour a perfect latte art heart, from the ideal milk temperature to the precise pouring technique. I’ll share my personal tips and tricks, gained from years of experience as a barista champion, to help you elevate your coffee game and create stunning designs that will impress your friends and family. Whether you’re a beginner or an experienced barista, this guide will provide you with the practical advice you need to take your latte art to the next level.
Table of Contents
Guide Overview: What You'll Need

Total Time: 30 minutes to 1 hour
Estimated Cost: $10 – $20
Difficulty Level: Intermediate
Tools Required
- Steam Wand on an espresso machine
- Pitcher or Jug for steaming and pouring milk
- Thermometer for monitoring milk temperature
- Latte Art Tool or Spoon for creating designs
Supplies & Materials
- Espresso Machine for pulling shots
- Milk whole milk or a non-dairy alternative
- Coffee Beans for pulling espresso shots
- Sugar or Sweetener optional
Step-by-Step Instructions
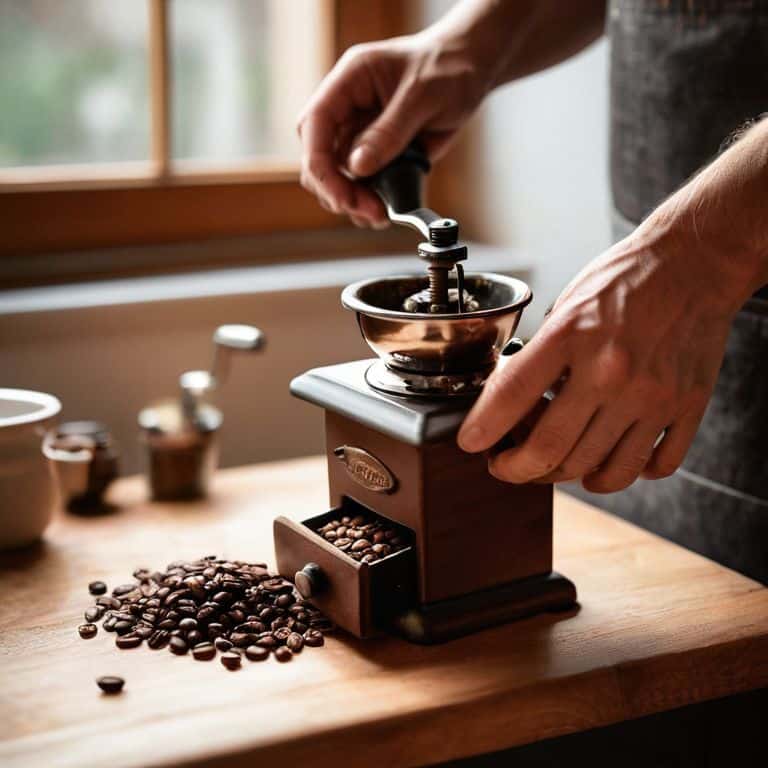
- 1. First, let’s get started with the foundation of a great latte art heart: pulling the perfect shot of espresso. This means using freshly roasted and ground coffee beans, and ensuring your machine is at the optimal temperature. I always check my machine’s temperature to ensure it’s between 195°F and 205°F, as this affects the flavor and quality of the shot.
- 2. Next, you’ll need to prepare your milk. This involves heating it to the right temperature and creating a smooth microfoam. I find that heating the milk to around 140°F to 150°F works best, and then using a steam wand to create a silky, smooth microfoam that will hold its shape when poured. It’s essential to purge the steam wand before and after use to ensure cleanliness and prevent any blockages.
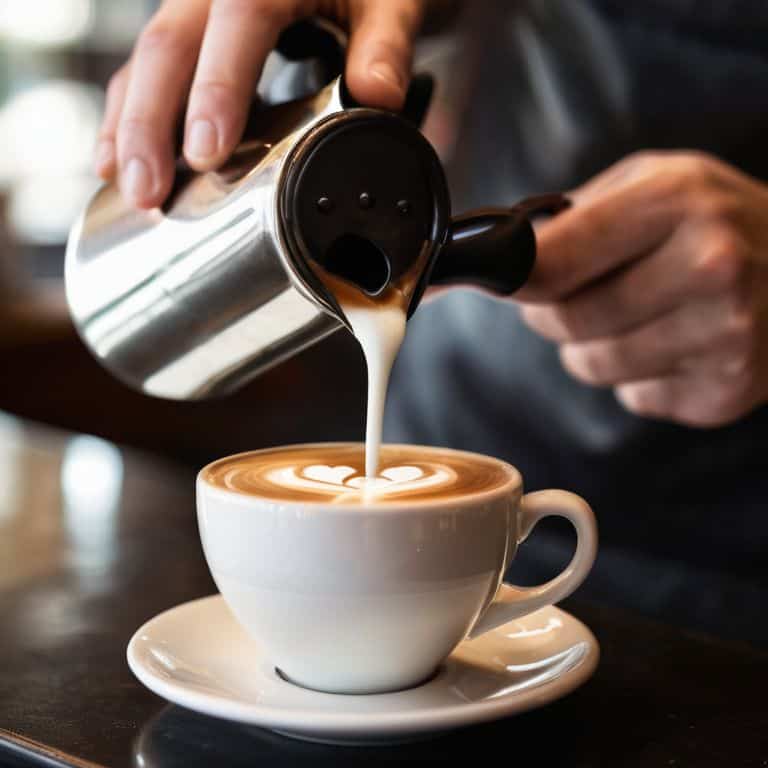
- 3. Now it’s time to pour the milk into the cup with the espresso. To create a heart, you’ll need to hold the pitcher at an angle and allow the milk to flow in a steady stream. Start by pouring a small amount of milk into the center of the cup to create a base, and then slowly move the pitcher in a circular motion to create the heart shape. Remember to keep the pour smooth and consistent, as any abrupt movements can ruin the design.
- 4. As you pour, focus on controlling the flow of milk to achieve the desired shape. You can do this by adjusting the height of the pitcher and the speed of the pour. Practice makes perfect, so don’t be discouraged if it takes a few attempts to get it right. I always practice my pour before a competition to get a feel for the milk and the pitcher.
- 5. To create the distinctive “points” of the heart, you’ll need to flick your wrist as you pour, creating a small burst of milk that will form the tip of the heart. This takes a bit of practice to get right, but the key is to use a smooth, flowing motion. Don’t jerk your wrist, as this will create a messy, uneven shape.
- 6. Once you’ve poured the heart, take a step back and admire your handiwork. Check to see if the heart is symmetrical and if the edges are clean and defined. If it’s not quite right, don’t worry – it’s all part of the learning process. I always take a moment to evaluate my pour and think about what I could do differently next time.
- 7. Finally, to take your latte art to the next level, experiment with different designs and techniques. Try pouring rosettas, leaves, or even intricate patterns. The key to mastering latte art is to practice regularly and be patient, as it takes time and dedication to develop the skills and muscle memory needed to create beautiful designs consistently.
A Guide to Pouring Latte Art Hearts

As I delve deeper into the world of latte art, I’m reminded of the importance of steaming milk for latte art. It’s a crucial step that can make or break the design. To achieve the perfect microfoam, I always focus on the temperature and texture of the milk. It’s all about finding that sweet spot where the milk is silky smooth and holds its shape.
When it comes to heart design techniques, I’ve found that practice is key. It’s not just about pouring the milk, but also about understanding the flow and movement of the liquid. I like to experiment with different pouring techniques for beginners, such as using a steady hand and a smooth, flowing motion. By mastering these techniques, you’ll be well on your way to creating stunning latte art designs.
To take your latte art game to the next level, consider investing in a high-quality espresso machine for latte art. This will give you the precision and control you need to craft beautiful designs. Additionally, having the right latte art tools and equipment can make all the difference. From thermometers to steaming pitchers, each tool plays a vital role in the latte art process. By combining the right equipment with a bit of creativity and practice, you’ll be pouring like a pro in no time.
Heart Design Techniques With Microfoam
To master the heart design, you need to wield microfoam like a brush. I’m talking about holding the pitcher at an angle, allowing the microfoam to flow smoothly, and then – in one swift motion – creating the heart’s shape. It’s all about feel and finesse. As I always say, “own that pour.”
With practice, you’ll develop a sense of when to release the microfoam, creating the perfect heart shape. Remember, it’s not just about the visual appeal, but also the texture and harmony of the design. I like to think of it as a symphony of milk and coffee, where every element is in perfect balance.
Steaming Milk for Latte Art Mastery
To truly master latte art, you need to start with perfectly steamed milk. I’m talking about a silky, smooth microfoam that’s capable of holding its shape. For me, it’s all about feeling the milk as it stretches and folds, almost like a living thing. To get it just right, I recommend using a thermometer to hit that sweet spot between 140°F and 160°F. Any higher, and you risk scalding the milk and losing that delicate texture.
When I’m steaming milk, I’m fully in the zone – it’s meditative, almost. I focus on the sound of the steam wand, the feel of the pitcher in my hand, and the sight of the milk transforming before my eyes. It’s a sensory experience that requires patience, practice, and a deep understanding of the milk’s behavior. By honing your steaming skills, you’ll be well on your way to creating latte art that’s truly breathtaking.
Mastering the Art: 5 Essential Tips for Pouring a Latte Art Heart
- Feel the flow: Don’t just pour the milk, become one with it – the rhythm and the texture are key to a perfect heart design
- Temperature control is everything: The ideal temperature for latte art milk is between 140°F and 160°F, any higher or lower and you’ll lose the silky texture
- Microfoam magic: The secret to a stunning heart lies in the microfoam – practice your steaming technique to achieve the perfect consistency and volume
- Free pour with confidence: Don’t be afraid to experiment and try new things – the more you practice free pouring, the more intuitive it becomes
- Symmetry is key: Pay attention to the balance and symmetry of your design – a perfectly poured heart is all about harmony and visual appeal
Key Takeaways for Latte Art Mastery
Mastering the art of latte heart pouring requires a deep understanding of milk steaming techniques, including the ideal temperature and texture for microfoam
Precision is key when creating heart designs with microfoam, and it’s essential to practice pouring techniques to achieve a balanced and symmetrical pattern
By combining the right steaming techniques with precise pouring methods, you’ll be well on your way to creating stunning latte art hearts that rival those found in professional coffee shops
The Art of Latte Perfection
A latte art heart is not just a design, it’s a reflection of the barista’s soul – every pour, every flow, every detail is a deliberate act of passion and precision, a symphony of milk and coffee that elevates the mundane to the sublime.
Julian Vale
Mastering the Art of Latte Hearts
As we conclude this journey to pour the perfect latte art heart, let’s recap the essentials: from mastering the art of steaming milk to creating intricate designs with microfoam. It’s all about feeling the flow of the milk and owning that pour, just like I do in competition. Remember, the key to a stunning latte art heart lies in the balance of texture and temperature, so don’t be afraid to experiment and find your own rhythm.
Now, as you embark on your own latte art journey, I want to leave you with a final thought: the pursuit of perfection is a lifelong passion. Don’t be discouraged by initial failures – every failed pour is an opportunity to learn and refine your technique. With dedication and practice, you’ll be crafting beautiful, intricate designs that will impress even the most discerning coffee connoisseurs. So, keep pushing the boundaries of what’s possible, and always strive for that perfect, heart-stopping pour.
Frequently Asked Questions
What's the ideal temperature and texture for steamed milk to create a stable latte art heart?
For a stable latte art heart, you want steamed milk at 140°F to 150°F, with a silky texture that’s not too thin or too thick. I’m talking microfoam that’s smooth, like whipped cream, but still holds its shape. That’s when the magic happens, and your heart design will sit proudly on top, defined and beautiful.
How do I adjust the flow of milk to achieve a symmetrical heart design?
To achieve a symmetrical heart, I adjust the flow of milk by subtly shifting my pitcher’s angle and velocity. It’s all about feeling the milk’s viscosity and temperature. I aim for a smooth, silky flow, then make micro-adjustments as I pour, watching how the milk interacts with the coffee’s surface tension. Practice helps you develop this intuitive sense.
Can I use any type of milk to create latte art, or are there specific types that work better for pouring hearts?
Not all milks are created equal for latte art. I swear by whole milk for its balanced fat content and microfoam stability. Skim milk and non-dairy alternatives can be trickier, but some baristas swear by them – it’s all about finding the right temperature and texture. For hearts, I recommend whole milk or a high-quality non-dairy milk alternative with a fat content around 3-4%.