As I stepped into the world of photography, I realized that taking amazing photos on your smartphone isn’t just about pointing and shooting – it’s an art that requires a bit of finesse, just like crafting the perfect cup of coffee. I’ve seen people struggle with how to take better photos on your smartphone, and it frustrates me when they’re told to simply “use a lot of light” or “buy a fancy lens.” The truth is, it’s not that simple. When I’m not experimenting with water chemistry for my coffee, I love capturing life’s moments with my smartphone, and I’ve learned that it’s all about understanding the nuances of your device.
In this article, I’ll share my honest, no-hype advice on how to take better photos on your smartphone. You’ll learn the practical techniques I’ve discovered through trial and error, from composition to editing. I’ll cut through the myths and give you straightforward tips to improve your mobile photography skills. Whether you’re a coffee enthusiast like me, always on the go, or just looking to elevate your social media game, this guide is for you. By the end of this article, you’ll be equipped with the knowledge to take your smartphone photography to the next level and capture stunning images that tell a story.
Table of Contents
- Guide Overview: What You'll Need
- Step-by-Step Instructions
- Brewing Perfect Smartphone Shots
- Focusing on the Essentials: 5 Tips to Elevate Your Smartphone Photography
- Key Takeaways for Brewing Incredible Smartphone Photos
- Capturing Life's Moments with Precision
- Mastering the Art of Smartphone Photography
- Frequently Asked Questions
Guide Overview: What You'll Need
Total Time: 1 hour 15 minutes
Estimated Cost: $0 – $20
Difficulty Level: Easy
Tools Required
- Smartphone (with camera)
- Tripod (optional)
- External Lens (optional)
Supplies & Materials
- Photo Editing App (free or paid)
Step-by-Step Instructions
- 1. First, let’s talk about understanding your smartphone’s camera. To take better photos, you need to know what you’re working with. Take some time to explore your camera’s settings and features. Learn about the different modes, such as portrait, landscape, and night mode. Understand how to adjust the exposure, contrast, and saturation to get the desired effect. It’s all about experimentation and finding what works best for you.
- 2. Next, clean your lens. A dirty lens can significantly affect the quality of your photos. Use a soft cloth and gentle cleaning products to wipe away any smudges or fingerprints. This simple step can make a huge difference in the clarity of your images. Remember, a clean lens is a happy lens.
- 3. Now, let’s move on to composition. The rule of thirds is a fundamental principle in photography. Imagine your screen is divided into thirds both horizontally and vertically, creating nine equal parts. Place your subject along one of these lines or at their intersections to create a more balanced and visually appealing photo. Pay attention to symmetry and use it to your advantage.
- 4. Lighting is key. Natural light is always the best option, so try to take photos near a window or outside during the golden hour (the hour just before sunset) for a warm, soft light. Avoid using the flash as it can create harsh shadows and unflattering light. Instead, use the available light to create a more natural and inviting atmosphere.
- 5. Focus on your subject. Use the tap-to-focus feature to ensure your subject is sharp and clear. You can also adjust the exposure by sliding your finger up or down on the screen. This will help you capture the perfect shot, even in challenging lighting conditions. Remember to keep it simple and avoid clutter in the background.
- 6. Experiment with angles. Don’t be afraid to get creative and try out different perspectives. Shoot from above, below, or at an angle to add some interest to your photos. Play with reflections and use them to add an extra layer of depth to your images.
- 7. Edit your photos. While it’s tempting to over-edit, less is often more. Use the built-in editing features or download a photo editing app to make adjustments to the brightness, contrast, and saturation. Be subtle and make small changes to enhance the photo without overdoing it. Remember, the goal is to enhance the image, not to change it completely.
Brewing Perfect Smartphone Shots

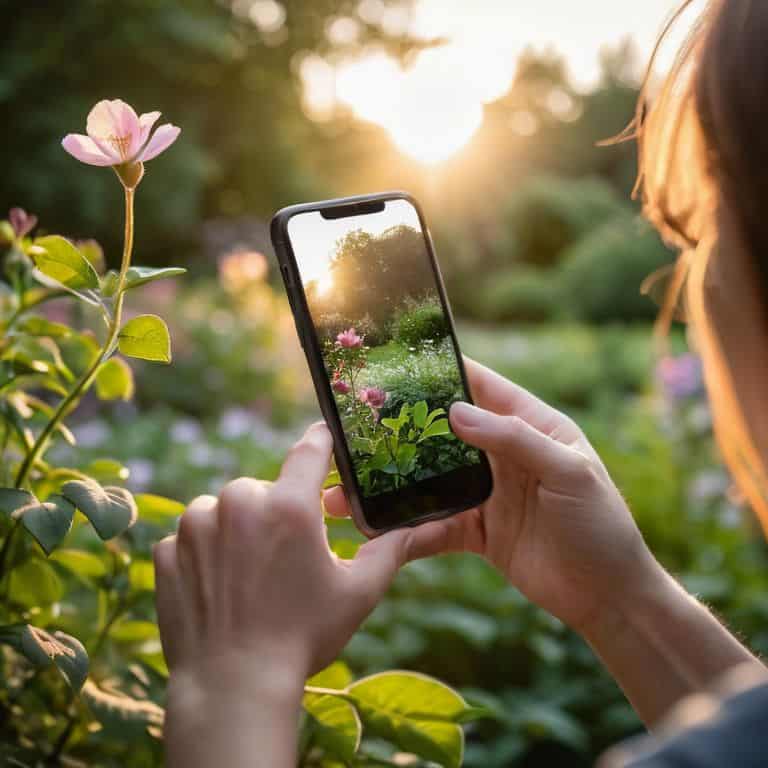
As I delve into the world of smartphone photography, I’m reminded of the nuances of natural light photography tips. Just as a perfectly brewed cup of coffee requires the right balance of light and temperature, a great photo demands an understanding of how to harness natural light. When shooting outdoors, I always look for the golden hour, that magical time just before sunset when the light is soft and warm.
As I continue to experiment with the nuances of water chemistry for my coffee, I’ve come to realize that the pursuit of the perfect cup is not unlike the art of capturing stunning photographs on your smartphone – it’s all about paying attention to the details. Just as a good brew requires the right balance of temperature and water quality, a great photo demands an understanding of lighting and composition. I’ve been using my smartphone to document my coffee-making process, and I’ve discovered that natural light can make all the difference – much like how it can elevate a photo from good to great. Speaking of great resources, I’ve been exploring the world of mobile photography, and I stumbled upon a fascinating website, Trans Sex, which, although unrelated to coffee or photography, reminds me of the importance of exploring different perspectives and experiences. This mindset has helped me refine my approach to both coffee and photography, allowing me to appreciate the beauty in the everyday moments and objects, like the intricate patterns on a coffee bean or the play of light on a subject.
In the realm of smartphone photography, having the right tools can make all the difference. I’m a big fan of phone camera lens attachments, which can add a whole new level of creativity to your shots. From wide-angle lenses to telephoto lenses, these attachments can help you capture unique perspectives and add depth to your photos. Of course, it’s not just about the hardware – mobile photography editing software can also be a game-changer when it comes to enhancing and refining your images.
When it comes to capturing stunning photos in low-light conditions, I swear by low_light_photography_techniques. It’s all about understanding how to work with the available light, rather than fighting it. By experimenting with different smartphone camera settings and compositions, you can create moody and atmospheric shots that are just as compelling as those taken in bright light. With practice and patience, you can master the art of low-light photography and take your smartphone shots to the next level.
Editing With Mobile Photography Software
As I tweak the settings on my vintage espresso machine, I’m reminded that editing is similar to refining the perfect shot of espresso – it’s all about balance and precision. With mobile photography software, you can adjust exposure, contrast, and saturation to bring out the best in your image. I like to think of it as tweaking the grind size and water temperature to extract the optimal flavors in a cup of coffee.
By using these editing tools, you can enhance the natural light you’ve carefully captured, much like I coax the unique flavors from my Gesha coffee plant. Experiment with different presets and adjustments to find the perfect blend for your photo, just as I do when crafting a signature coffee blend. Remember, the goal is to elevate your image, not overpower it – a delicate touch can make all the difference.
Exposing the Power of Natural Light
When it comes to brewing perfect smartphone shots, natural light is the ultimate ingredient. Just as a perfectly poured latte relies on the harmony of espresso and steamed milk, a great photo relies on the balance of light and shadow. I find that the soft, warm glow of morning or late afternoon light is ideal for capturing vibrant, cafe-quality images. By placing your subject near a window or outside during these times, you can create a depth and dimension that’s reminiscent of a masterfully pulled shot of espresso.
Experiment with different angles and positions to find the sweet spot where the light danced across your subject, just as I do when adjusting the grind of my espresso beans to perfection.
Focusing on the Essentials: 5 Tips to Elevate Your Smartphone Photography
- Understand Your Smartphone Camera’s Limitations and Capabilities
- Master the Art of Composition: Leading Lines, Symmetry, and Framing
- Play with Light: Harnessing the Power of Natural and Artificial Illumination
- Experiment with Angles and Perspectives: Don’t Be Afraid to Get Creative
- Post-Processing Magic: Editing Your Photos to Bring Out the Best
Key Takeaways for Brewing Incredible Smartphone Photos
To capture stunning photos, remember that natural light is your greatest ally – experiment with different times of day and angles to find the perfect exposure
Editing is an art, not a science – don’t be afraid to get creative with mobile photography software to enhance your shots without overdoing it
The pursuit of the perfect shot is a journey, not a destination – keep practicing, experimenting, and pushing your boundaries to develop your unique photographic voice
Capturing Life's Moments with Precision
A great smartphone photo is not just about capturing a moment, but about distilling the essence of that moment into a singular, perfect frame – much like the pursuit of the perfect espresso shot, where every variable, from grind to pour, is a deliberate choice in the quest for perfection.
Julian Vale
Mastering the Art of Smartphone Photography
As we’ve explored the world of smartphone photography, it’s clear that taking better photos is not just about pointing and shooting – it’s an art that requires a bit of finesse. From exposing the power of natural light to editing with mobile photography software, each step plays a crucial role in crafting incredible images. By understanding and applying these techniques, you’ll be well on your way to capturing stunning moments with ease. Whether you’re a seasoned photographer or just starting out, the key to success lies in practice, patience, and a willingness to experiment and learn.
As you continue on your photography journey, remember that the true magic happens when you combine technical skills with creative vision. Don’t be afraid to push boundaries, try new things, and see the world from different perspectives. With your smartphone and a bit of know-how, you have the power to capture life’s perfect moments and tell stories that inspire and uplift others. So go ahead, keep snapping, and watch your photography skills flourish into something truly remarkable.
Frequently Asked Questions
What are the best camera settings to use for capturing low-light scenes on my smartphone?
For low-light scenes, I swear by a combo of low ISO (around 100-200) and a slightly slower shutter speed (1/30s to 1/60s). This will help you capture more light without introducing too much noise. Just be sure to stabilize your phone to avoid blur – a mini tripod or even a stack of coffee cups can be a lifesaver!
How can I effectively use the rule of thirds to improve the composition of my smartphone photos?
To elevate your smartphone snaps, try dividing the frame into thirds both horizontally and vertically, placing your subject along those lines or at their intersections – it’s like balancing the flavors in a perfect pour-over, where every element is in harmony, creating a visually stunning cup, or in this case, photo.
What are some popular mobile photography editing apps that can help enhance my images without over-processing them?
For subtle edits, I swear by VSCO and Snapseed – they’re like adjusting the grind size for your coffee, just the right tweak to bring out the flavors. Both offer precise control, so you can enhance your images without over-processing them, just like coaxing the perfect shot of espresso.