I still remember the first time I tried to steam milk – it was a disaster. The how to steam milk guides I read back then made it sound so easy, but the reality was far from it. I was left with a pitcher of scalded, bubbly mess that resembled nothing like the silky microfoam I’d seen in coffee shops. It was frustrating, to say the least, and I soon realized that mastering the art of steaming milk was not just about following a set of instructions, but about understanding the nuances of temperature, texture, and technique.
As a certified barista trainer, I’ve seen many aspiring coffee enthusiasts struggle with the same challenges I faced. That’s why I’m excited to share my no-nonsense guide on how to steam milk like a pro. In this article, I’ll walk you through the step-by-step process of steaming milk to perfection, from choosing the right type of milk to adjusting the steam wand’s position. You’ll learn how to create a smooth, velvety microfoam that will elevate your coffee game and impress even the most discerning coffee connoisseurs. By the end of this guide, you’ll be well on your way to mastering the art of steaming milk and taking your coffee-making skills to the next level.
Table of Contents
Guide Overview: What You'll Need

Total Time: 10 minutes
Estimated Cost: $0 – $10
Difficulty Level: Easy
Tools Required
- Milk Frothing Pitcher or a small saucepan
- Steam Wand from an espresso machine
- Thermometer optional
Supplies & Materials
- Milk whole, skim, or a non-dairy alternative
- Water for steam generation
Step-by-Step Instructions
- 1. First, purge the steam wand by releasing a small amount of steam into the air to remove any excess water that may have accumulated inside. This is a crucial step, as it ensures that the steam is dry and clean, which is essential for creating a smooth and silky milk texture. I like to think of it as a way to _clear the pipes_ and get the steam wand ready for action.
- 2. Next, submerge the steam wand into the milk, holding it at an angle to create a whirlpool effect. This helps to incorporate air into the milk, which is necessary for creating a creamy and velvety texture. As you hold the steam wand, make sure to keep it about 1-2 cm below the surface of the milk to avoid creating too much foam.
- 3. Now, turn on the steam and begin to heat the milk. It’s essential to monitor the temperature closely, as it can quickly go from perfectly heated to scalded. I use a thermometer to ensure that the milk reaches the ideal temperature of around 145°F to 155°F. This is the sweet spot where the milk is hot but not too hot, and it’s perfect for creating a smooth and creamy texture.
- 4. As the milk is heating up, use the steam wand to create a smooth and silky texture. To do this, move the wand up and down slowly, holding it at a slight angle to create a gentle swirling motion. This helps to break down the fat molecules in the milk and create a uniform texture that’s perfect for pouring.
- 5. Once the milk has reached the desired temperature, turn off the steam and remove the wand from the milk. Hold the pitcher at an angle and swirl the milk gently to create a smooth and even texture. This is an important step, as it helps to eliminate any air pockets or bubbles that may have formed during the steaming process.
- 6. Now, it’s time to create the perfect microfoam. To do this, hold the steam wand just below the surface of the milk and turn on the steam for a brief moment. This will create a thin layer of foam on top of the milk that’s perfect for topping espresso drinks. Be careful not to over-aerate the milk, as this can create a thick and chunky foam that’s not desirable.
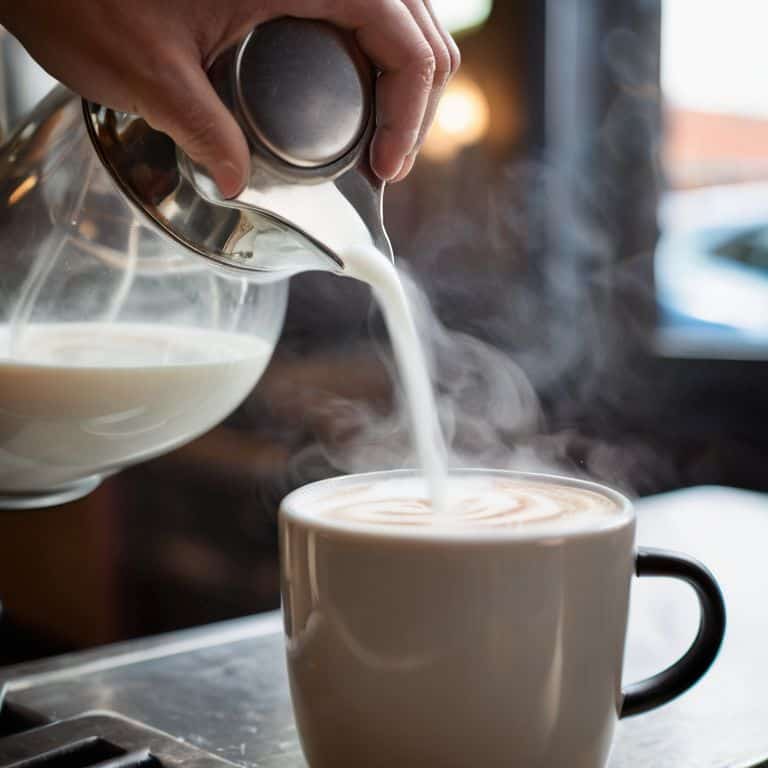
- 7. Finally, pour the steamed milk into your espresso drink, holding the pitcher at an angle to create a smooth and flowing motion. As you pour, use a spoon to hold back the foam, creating a layered effect that’s both visually appealing and delicious. With practice, you’ll be able to create a perfectly steamed milk that’s worthy of any coffee shop.
Mastering How to Steam Milk

As I delve deeper into the world of milk steaming, I’ve come to realize that frothing milk techniques are just the tip of the iceberg. To truly master the art, one must also consider the importance of steam wand maintenance. A clean and well-maintained steam wand is essential for producing silky, smooth microfoam. I make it a point to descale my steam wand regularly and purge it before each use to ensure optimal performance.
When it comes to milk texturing tips, I’ve found that temperature control is crucial. The ideal temperature for steaming milk is between 140°F and 160°F. Any higher, and you risk scorching the milk; any lower, and you won’t achieve the desired level of froth. I’ve experimented with different temperature control for steaming methods, including using a thermometer to monitor the temperature of my steaming pitcher.
To create microfoam at home, it’s essential to understand the nuances of espresso machine steam settings. I’ve spent countless hours adjusting the steam pressure and flow rate on my machine to achieve the perfect balance. By doing so, I’ve been able to craft beautiful, velvety microfoam that rivals that of any high-end cafe. With practice and patience, you can too – and trust me, the pursuit of the perfect microfoam is a journey worth taking.
Steam Wand Maintenance for Baristas
To truly master the art of steaming milk, you need to pay attention to the often-overlooked steam wand. I make it a habit to purge and clean my wand after every use, and descale it monthly. This ensures a smooth, even flow of steam that’s essential for crafting perfect microfoam. A well-maintained wand is less prone to clogging and will help you achieve consistent results.
Regular maintenance also involves checking the wand’s tip for any blockages or mineral buildup. I use a soft brush to gently scrub away any debris, and then wipe it down with a clean cloth. By taking care of your steam wand, you’ll be able to focus on the nuances of steaming milk, like temperature and texture, and take your coffee game to the next level.
The Art of Frothing Milk Techniques
As I delve deeper into the world of steaming milk, I’ve come to realize that frothing is an art form in itself. It’s all about creating a delicate balance of air and milk, where the texture is silky smooth and the flavor is rich and velvety. To achieve this, I’ve experimented with various frothing techniques, from the basic “stretching” method to more advanced microfoam creations.
My favorite technique is the “swirling” method, where I hold the pitcher at an angle and swirl the milk in a circular motion, creating a whirlpool effect that incorporates just the right amount of air. It’s a delicate dance between heat, texture, and timing, but when done correctly, it produces a froth that’s nothing short of magical.
Steaming Like a Pro: 5 Essential Tips to Elevate Your Game
- Start with cold milk: I always stress the importance of beginning with refrigerated milk to achieve the perfect microfoam, as it helps in creating a smoother texture and better stability
- Purge the steam wand: Before you start steaming, give the wand a quick purge to remove any excess water – trust me, it makes a difference in the flavor and prevents any unwanted water from diluting your milk
- Monitor the temperature: Aim for a temperature range between 140°F and 160°F for optimal steaming, as this range allows for the perfect balance between texture and flavor development
- Stretch and fold with intention: When stretching and folding the milk, do it with a purpose – focus on incorporating air and breaking down the milk particles to create a silky, velvety texture that’s a joy to work with
- Practice, practice, practice: Like any skill, mastering the art of steaming milk takes time and practice, so don’t be discouraged if it doesn’t come out perfectly at first – keep at it, and you’ll soon be creating beautiful, cafe-quality microfoam like a pro
Key Takeaways for Mastering Milk Steaming
I’ve found that the ideal steam wand temperature for microfoam is between 140°F and 150°F, which allows for a silky smooth texture that’s essential for latte art
Regular maintenance of the steam wand is crucial, as a clean wand ensures consistent steam pressure and prevents any off-flavors from affecting the milk, so make it a habit to purge and wipe down the wand after each use
Experimenting with different milk types and ratios can elevate your steaming game, but remember that the key to perfect microfoam lies in the technique, not just the ingredients – practice your stretching and folding to achieve that perfect balance of air and liquid
The Heart of Steaming
Steaming milk is not just about heating it up, it’s about coaxing out the perfect harmony of texture and temperature, a symphony that elevates the entire coffee experience.
Julian Vale
Mastering the Art of Steaming Milk: A Journey to Perfection
As I reflect on our journey to master the art of steaming milk, I want to emphasize the importance of precision and attention to detail. From the initial steps of purging the steam wand to the final touches of polishing the milk to a silky microfoam, every element plays a crucial role in achieving that perfect cup. We’ve covered the essential techniques, from frothing milk to maintaining the steam wand, and I hope you’ve gained a deeper understanding of the craft. Remember, practice is key, and it’s through consistent effort that you’ll develop the muscle memory and intuition to create truly exceptional coffee drinks.
As you continue on your own path to mastering the art of steaming milk, I want to leave you with a final thought: the pursuit of the perfect cup is a never-ending journey. It’s a journey that requires patience, dedication, and a willingness to experiment and learn. But I promise you, the reward is well worth the effort. There’s something truly special about crafting a cup of coffee that’s not just a drink, but an experience – one that can evoke emotions, spark connections, and create lasting memories. So, keep pushing the boundaries, keep striving for perfection, and most importantly, keep enjoying the ride.
Frequently Asked Questions
What's the ideal temperature for steaming milk to achieve the perfect microfoam?
For me, the sweet spot is between 140°F and 160°F. Any higher, and you risk scalding the milk, while lower temperatures won’t produce that silky microfoam I’m obsessed with. I aim for 150°F, and then it’s all about the technique to create a smooth, velvety texture that’s just perfect.
How often should I clean and maintain my steam wand to prevent any buildup or flavor transfer?
I clean my steam wand after every use, and do a deep clean weekly. Daily purging and wiping down prevents milk residue buildup, while weekly descaling and soaking in a mixture of water and vinegar ensures flavor transfer is eliminated and the wand remains in top condition.
Can I use any type of milk for steaming, or are there specific types that work better for certain coffee drinks?
Not all milks are created equal. I swear by whole milk for lattes and cappuccinos, but for a silky microfoam, I opt for non-fat or a non-dairy alternative like almond or soy milk. The key is to experiment and find the perfect balance for your desired coffee drink.