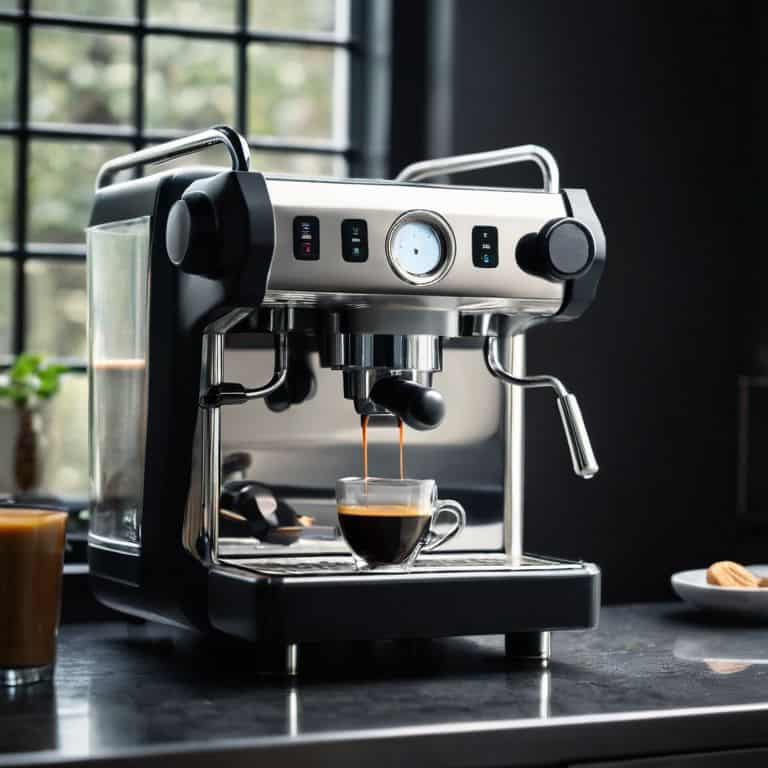
I still remember the first time I stumbled upon a guide to the aeropress inverted method. It was like a revelation – the flavors were more nuanced, the body was richer, and the entire experience was elevated. But what really got me was the myth that this method is only for coffee aficionados. I’ve seen people struggle to get it right, and it’s not because they’re not capable, but because they’ve been misled by overly complicated instructions. The truth is, mastering the Aeropress inverted method is within reach for anyone willing to put in the practice.
In this article, I’ll share my no-nonsense approach to brewing with the Aeropress inverted method. You’ll learn the key principles behind this technique, from the ideal water temperature to the perfect grind size. I’ll walk you through a step-by-step process that’s easy to follow and replicate, so you can start enjoying cafe-quality coffee in the comfort of your own home. By the end of this guide, you’ll be equipped with the knowledge and confidence to experiment and find your perfect cup. So, let’s dive in and explore the world of a guide to the aeropress inverted method together.
Table of Contents
- Guide Overview: What You'll Need
- Step-by-Step Instructions
- A Guide to the Aeropress Inverted Method
- Invert Your Expectations Aeropress Brewing Techniques
- Optimizing Aeropress Coffee to Water Ratio for Perfection
- Elevate Your Brew: 5 Expert Tips for Mastering the Aeropress Inverted Method
- Key Takeaways for the Perfect Aeropress Brew
- The Pursuit of Perfection
- Mastering the Aeropress: A Path to Coffee Enlightenment
- Frequently Asked Questions
Guide Overview: What You'll Need
Total Time: 10 minutes
Estimated Cost: $0 – $20 (assuming you already have an Aeropress)
Difficulty Level: Easy
Tools Required
- Aeropress (required for the method)
- Kettle (for heating water)
- Scale (optional, but recommended for precise measurements)
- Spoon or stirrer (for mixing the coffee grounds and water)
Supplies & Materials
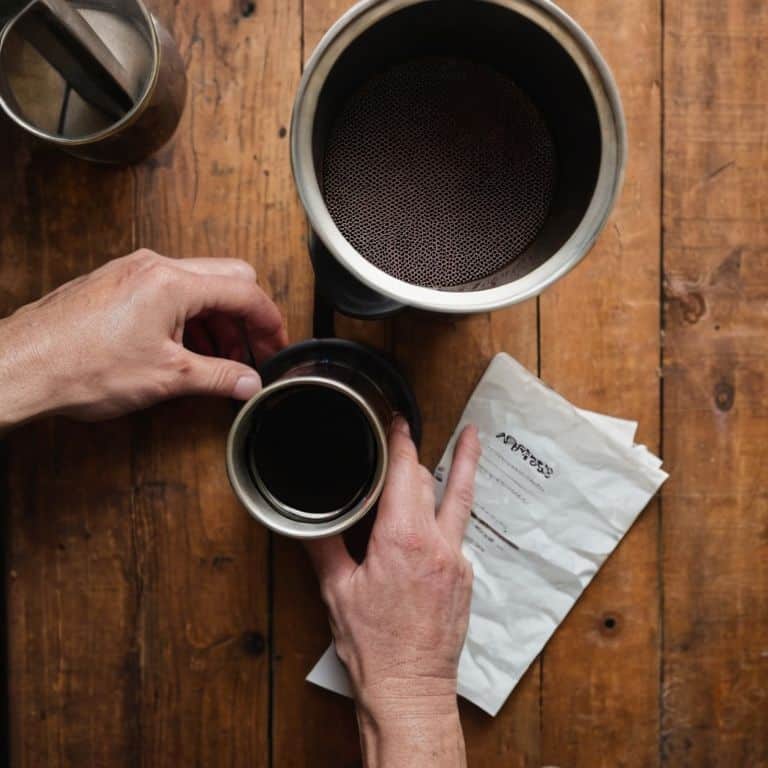
- Coffee beans (choose your preferred coffee beans)
- Filter papers (optional, but recommended for a cleaner cup)
- Hot water (heated to the desired temperature, around 200 degrees Fahrenheit)
Step-by-Step Instructions
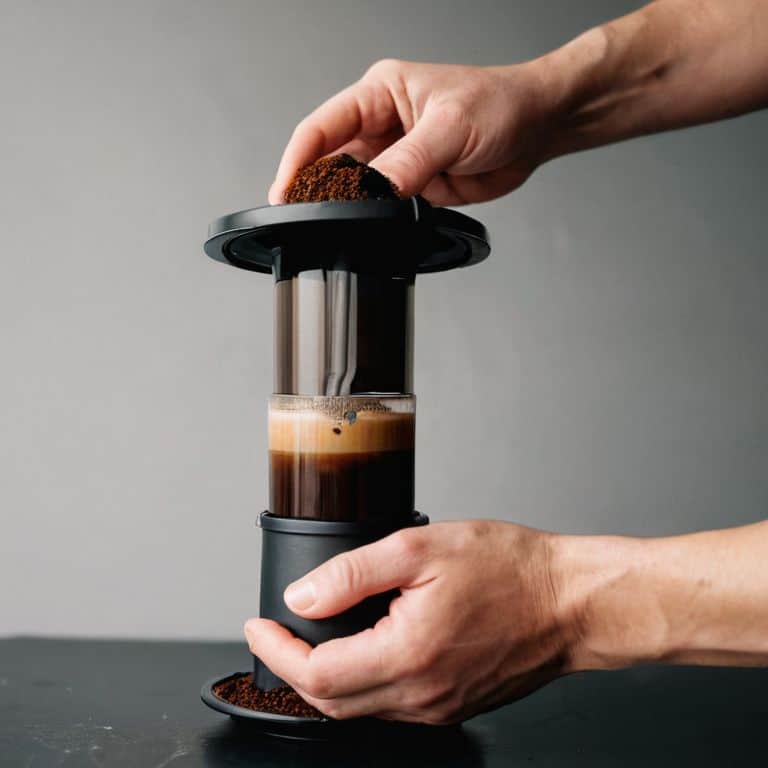
- 1. First, let’s start with the basics: to master the Aeropress inverted method, you need to understand that it’s all about controlling the flow of water through the coffee grounds. This means you’ll be turning your Aeropress upside down, which can feel a bit counterintuitive at first, but trust me, it’s a game-changer.
- 2. Next, you’ll want to prepare your equipment: grab your Aeropress, a scale, a grinder, and your favorite coffee beans. I’m a bit of a coffee nerd, so I like to use a burr grinder to get the perfect grind size – it makes all the difference in the world.
- 3. Now it’s time to measure your coffee: for a standard Aeropress, you’ll want to use about 17 grams of coffee for every 240 grams of water. Don’t be afraid to experiment with different ratios, but this is a good starting point. I like to think of it as a sacred balance between coffee and water.
- 4. With your coffee measured, it’s time to heat up your water. I’m extremely particular about my water temperature – it needs to be between 93°C and 96°C for optimal extraction. Anything outside of this range, and you’ll be losing out on some serious flavor.
- 5. Now, let’s talk about grind size: you’ll want to aim for a medium-coarse grind, similar to kosher salt. This will allow for the perfect amount of flow through the coffee grounds. I like to think of grind size as the unsung hero of coffee brewing – it can make or break your cup.
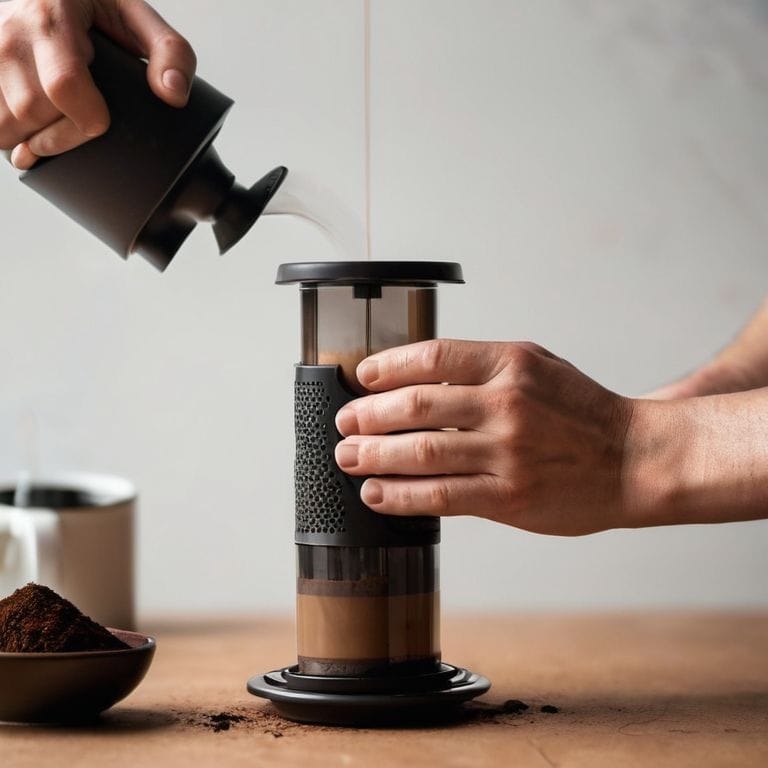
- 6. With your water heated and your coffee ground, it’s time to assemble the Aeropress. Place the filter in the cap, and screw it onto the bottom of the Aeropress (which is actually the top, since we’re using it upside down). Then, add your coffee grounds to the Aeropress, making sure to level them out evenly.
- 7. Next, pour a small amount of water (about 30-40 grams) over the coffee grounds to saturate them. This is called the “bloom” phase, and it’s where the magic starts to happen. Let it sit for about 45 seconds to allow the coffee to release its CO2.
- 8. After the bloom phase, it’s time to add the rest of the water. Pour in the remaining 200-210 grams of water, making sure to pour in a circular motion to evenly saturate all of the grounds. Then, stir the mixture gently to ensure all of the coffee is in contact with the water.
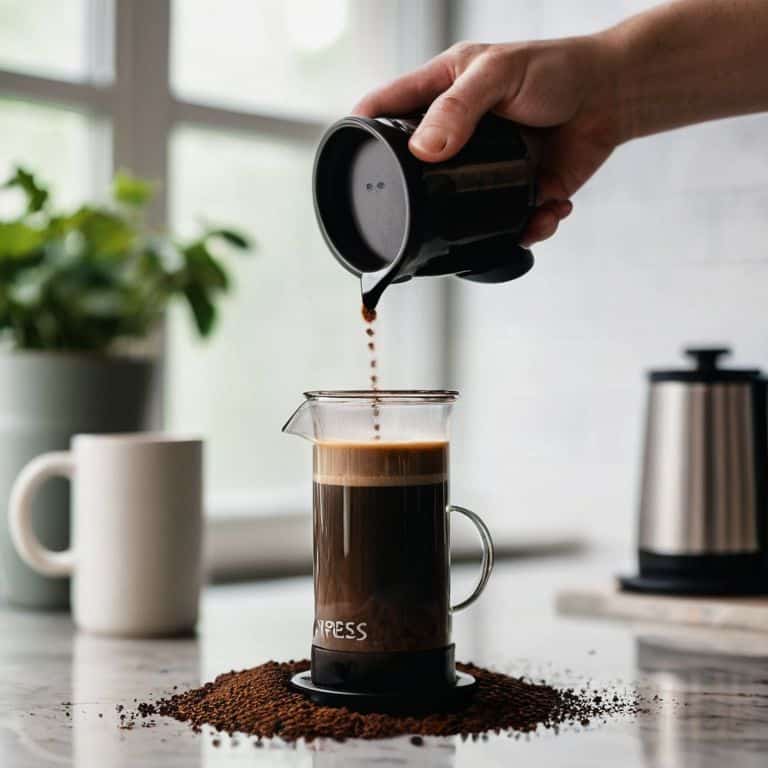
- 9. Finally, steep and press: let the mixture steep for about 1-2 minutes, depending on your desired strength, and then slowly press the plunger down to separate the grounds from the liquid. And that’s it – you should now have a perfectly brewed cup of coffee using the Aeropress inverted method.
A Guide to the Aeropress Inverted Method
As I delve deeper into the world of Aeropress brewing, I’ve come to realize that mastering the inverted method is just the beginning. To truly unlock the potential of this brewer, it’s essential to experiment with different aeropress coffee to water ratios. I’ve found that a ratio of 1:15 to 1:17 works beautifully, but feel free to tweak it to your liking.
When it comes to troubleshooting aeropress issues, I’ve encountered my fair share of common mistakes. One of the most significant errors is using water that’s too hot, which can lead to a bitter taste. To avoid this, I recommend using water at a temperature between 93°C and 96°C.
In comparison to other brewing methods, such as aeropress vs french press, I believe the Aeropress offers a cleaner and more nuanced flavor profile. To maintain this quality, it’s crucial to prioritize aeropress cleaning and maintenance, ensuring that every brew is free from any residual flavors or oils. By following these tips, you’ll be well on your way to brewing exceptional coffee with your Aeropress.
Invert Your Expectations Aeropress Brewing Techniques
Now that we’ve covered the basics, let’s dive into the nuances of Aeropress brewing. To truly invert your expectations, you need to understand the interplay between coffee and water. I’m obsessed with the details, from grind size to water temperature, and it’s astonishing how much of a difference these factors can make. By tweaking these variables, you can coax out unique flavor profiles that will elevate your Aeropress game. For instance, a slightly coarser grind can result in a cleaner, brighter cup, while a precise water temperature can bring out the optimal balance of acidity and sweetness.
Optimizing Aeropress Coffee to Water Ratio for Perfection
To truly elevate your Aeropress game, you need to dial in the perfect coffee to water ratio. I’m talking about a ratio that’s precisely calibrated to bring out the full flavor potential of your beans. For me, the sweet spot is around 1:15 to 1:17 – that’s one gram of coffee for every 15-17 grams of water. This ratio allows for a balanced extraction that’s neither too bitter nor too weak. By adjusting this ratio, you can fine-tune the flavor profile to suit your taste preferences. Experiment with small increments to find your ideal ratio, and don’t be afraid to push the boundaries – after all, the pursuit of the perfect cup is all about precision and passion.
Elevate Your Brew: 5 Expert Tips for Mastering the Aeropress Inverted Method
- Start with a precise coffee-to-water ratio, aiming for 1:15 to 1:17 to bring out the optimal flavors in your brew
- Experiment with grind sizes to find the sweet spot for your Aeropress – a burr grinder is essential for achieving consistent results
- Preheat your Aeropress and any serving vessels to ensure a stable temperature environment, crucial for even extraction
- Pay close attention to the bloom phase, allowing the coffee to bloom for 45 seconds to 1 minute before pouring the rest of the water to prevent channeling and under-extraction
- Stir the coffee gently after adding water to ensure all grounds are saturated, then wait for the full 2-3 minutes for the best possible extraction before pressing and serving
Key Takeaways for the Perfect Aeropress Brew
Invert Your Expectations: Mastering the Aeropress inverted method is crucial for a richer, fuller-bodied coffee that rivals cafe-quality brews
Precision is Key: Optimizing the coffee to water ratio and paying close attention to grind size, water temperature, and brewing time are essential for unlocking the perfect cup
Experiment and Refine: Don’t be afraid to tweak variables like water chemistry and coffee bean origin to elevate your Aeropress game and discover your ideal flavor profile
The Pursuit of Perfection
The Aeropress inverted method is not just a technique, it’s a mindset – it’s about surrendering to the nuances of coffee and water, and embracing the beauty of imperfection in pursuit of the perfect cup.
Julian Vale
Mastering the Aeropress: A Path to Coffee Enlightenment
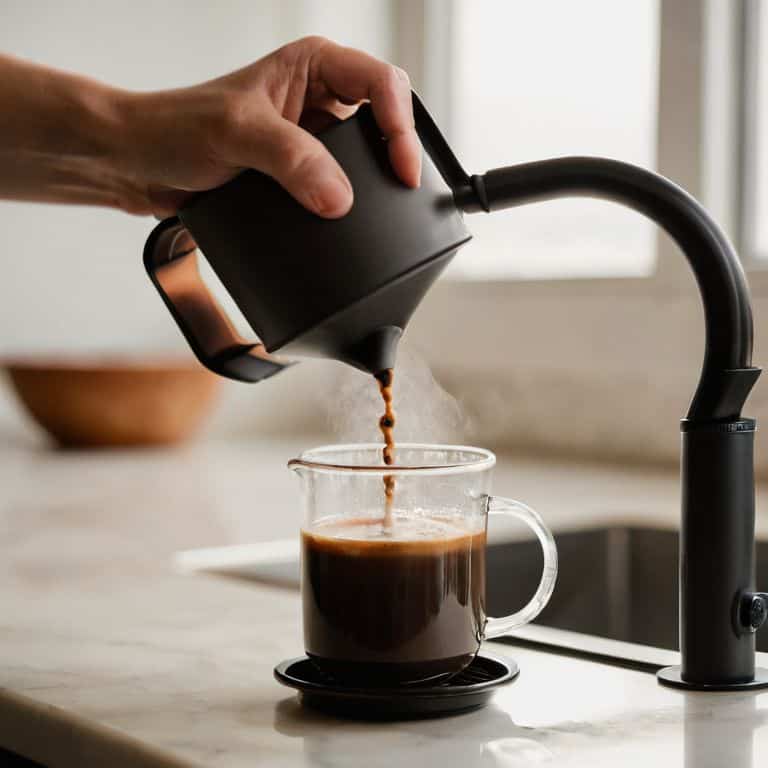
As we conclude this journey through the Aeropress inverted method, remember that precision is key. We’ve covered the step-by-step guide, delved into the importance of the coffee to water ratio, and explored the nuances of Aeropress brewing techniques. It’s crucial to experiment and find your balance, as this method allows for a high degree of customization to suit your taste preferences. By mastering the Aeropress inverted method, you’re not just brewing coffee, you’re elevating your daily ritual to an art form.
Now, as you embark on your own Aeropress journey, I encourage you to embrace the pursuit of perfection. Don’t be afraid to push the boundaries of what you thought was possible with your Aeropress. With patience, practice, and a keen sense of taste, you’ll be well on your way to crafting cafe-quality cups in the comfort of your own home. The world of coffee is vast and wondrous, and I’m thrilled to have been your guide on this leg of the adventure. Happy brewing!
Frequently Asked Questions
What is the ideal water temperature for the Aeropress inverted method?
For the Aeropress inverted method, I swear by a water temperature of 93°C to 96°C. This narrow range coaxes out the optimal balance of acidity and sweetness from your beans. Anything outside this zone, and you’ll miss the mark – trust me, I’ve experimented extensively to find this sweet spot.
How does the grind size of the coffee beans affect the flavor in the Aeropress inverted method?
Grind size is crucial in Aeropress inverted method, as it affects extraction. A burr grinder is a must, and I aim for a medium-coarse grind, around 1.2-1.4 mm. This allows for the perfect balance of flavors, neither too bitter nor too sour. Experiment with grind sizes to find your sweet spot, but remember, precision is key to unlocking the full flavor potential of your coffee beans.
Can I use the Aeropress inverted method to brew coffee with a darker roast or is it better suited for lighter roasts?
Darker roasts can work beautifully with the Aeropress inverted method, but be aware that they’ll bring a bolder, more bitter flavor. I recommend a slightly coarser grind and a shorter steep time to balance it out. Lighter roasts, on the other hand, will shine with brighter, more nuanced notes – it’s all about finding that perfect harmony.