I still remember the first time I tried to make nitro cold brew at home – it was a disaster. The instructions I followed were vague, and the result was a bland, over-extracted mess. But I didn’t give up. As a certified Q Grader and National Barista Champion, I was determined to crack the code. I spent countless hours experimenting with different roasts, grind sizes, and brewing times to perfect my nitro cold brew recipe. And let me tell you, it’s been a game-changer. The rich, smooth flavor and velvety texture are addictively good. If you’re struggling to make nitro cold brew at home, you’re not alone – but with the right guidance, you can achieve cafe-quality results.
In this article, I’ll share my no-nonsense advice on how to make nitro cold brew at home. I’ll walk you through the step-by-step process, from choosing the right coffee beans to troubleshooting common mistakes. You’ll learn how to fine-tune your brewing technique and optimize your equipment for the best possible results. My goal is to empower you with the knowledge and skills to create exceptional nitro cold brew that rivals your favorite coffee shop. So, if you’re ready to take your coffee game to the next level, keep reading – I’m about to spill all my secrets on how to make nitro cold brew at home.
Table of Contents
Guide Overview: What You'll Need

Total Time: 12 hours to 24 hours
Estimated Cost: $20 – $50
Difficulty Level: Intermediate
Tools Required
- Coffee Grinder (for grinding coffee beans)
- Fine-Mesh Strainer (for straining coffee grounds)
- Large Glass or Stainless Steel Container (with a lid, for steeping coffee)
- Measuring Cups and Spoons (for accurate measurements)
- Whisk or Spoon (for mixing)
- Nitrogen Charger or Whipped Cream Dispenser (for infusing nitrogen)
Supplies & Materials
- Arabica Coffee Beans (1 pound)
- Cold Water (4 cups)
- Nitrogen or Nitrous Oxide Cartridges (for nitrogen charger or whipped cream dispenser)
- Sugar or Sweetener (optional) (for flavoring)
- Cream or Milk (optional) (for flavoring)
Step-by-Step Instructions
- 1. First, let’s start with the basics of cold brew: you’ll need a large glass or plastic container, a fine-mesh strainer, and a coffee grinder. I like to use a burr grinder to get a consistent grind, which is crucial for even extraction. Now, I know what you’re thinking, “Julian, why not use a blade grinder?” Well, my friend, it’s all about the precision of the grind – burr grinders produce a more consistent particle size, which leads to a smoother, more full-bodied cold brew.
- 2. Next, you’ll need to measure out your coffee and water. I recommend using a ratio of 1:4 coffee to water, but feel free to experiment and find your perfect balance. For a standard batch, I use about 250 grams of coffee and 1 liter of water. Now, here’s where things get interesting – I like to use filtered water to prevent any impurities or minerals from affecting the taste of my cold brew. Yes, it’s a bit nitpicky, but trust me, it makes a difference.
- 3. Now it’s time to grind your coffee. As I mentioned earlier, I’m a bit of a grind size enthusiast, and for cold brew, you’ll want to aim for a medium to coarse grind. This will allow for the perfect amount of extraction during the steeping process. Don’t worry if it takes a few tries to get it just right – I’ve spent hours tweaking my grind size to get the perfect cup.
- 4. With your coffee ground, it’s time to combine it with the water in your container. I like to use a large glass jar with a wide mouth, as it makes it easy to stir and steep the mixture. Simply add the ground coffee to the jar, pour in the water, and give it a good stir to make sure all the grounds are saturated. Now, here’s the important part: let it steep for at least 18 hours – the longer, the better, in my opinion.
- 5. After the steeping process, it’s time to strain the mixture and separate the coffee from the grounds. I use a fine-mesh strainer to catch all the tiny particles and leave me with a smooth, sediment-free cold brew. Be careful not to squeeze the grounds or you’ll end up with a bitter taste – just let the liquid drip through the strainer and discard the solids.
- 6. Now that you have your cold brew, it’s time to add the nitro element. You’ll need a nitrogen charger and a special valve to dispense the gas. I won’t go into too much detail here, as it can get a bit technical, but essentially, you’ll be charging the cold brew with nitrogen gas, which will give it a creamy, velvety texture and a rich, smooth flavor.
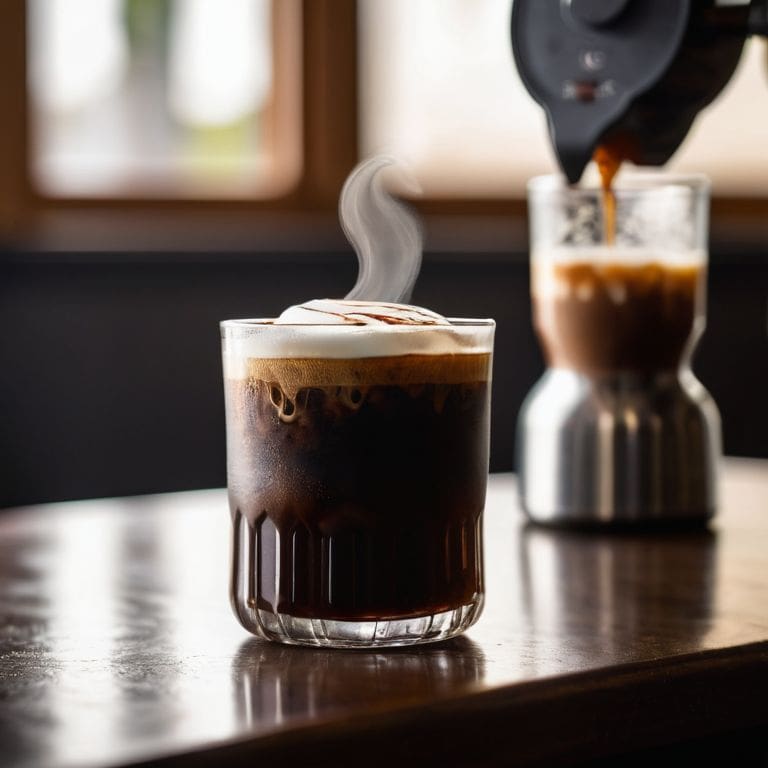
- 7. Finally, it’s time to serve your nitro cold brew. I like to use a tall glass and pour the coffee slowly, allowing the nitrogen to mix with the liquid and create a beautiful cascade effect. The result is a luxurious and creamy coffee drink that’s perfect for hot summer days or as a special treat any time of the year. Just be careful not to over-charge the coffee, or it’ll be too foamy – you want to find that perfect balance between cream and coffee.
Nitro Cold Brew Revolution
As I delve deeper into the world of nitro cold brew, I’ve come to realize that it’s not just about the perfect coffee to water ratio, but also about the art of nitrogen infusion. The method of infusing nitrogen into your cold brew coffee concentrate can make all the difference in the flavor and texture of the final product. I’ve experimented with various nitrogen infusion methods, and I can confidently say that it’s worth investing time and effort into finding the one that works best for you.
One of the most crucial aspects of nitro cold brew is storing it properly. You want to make sure that your nitro cold brew equipment is clean and well-maintained to prevent any contamination or spoilage. I’ve found that storing my nitro cold brew in a sealed container in the refrigerator can help preserve the flavor and texture for a longer period. Additionally, I’ve noticed that the cold brew coffee health benefits are amplified when consumed fresh, so it’s essential to store it correctly to reap the most benefits.
When it comes to experimenting with nitro cold brew, I believe that it’s essential to invest in good quality equipment. The cost of nitro cold brew equipment can vary, but I’ve found that it’s worth the investment in the long run. A good nitro cold brew machine can make all the difference in the flavor and texture of your coffee, and it’s definitely worth considering if you’re serious about taking your coffee game to the next level.
Cold Brew Coffee Concentrate Secrets
As I delve deeper into the world of nitro cold brew, I’ve discovered that the key to a truly exceptional cup lies in the cold brew coffee concentrate itself. It’s all about coaxing out the perfect balance of flavors and oils from those precious coffee beans. I’m obsessed with experimenting with different roast levels, grind sizes, and steeping times to create the ultimate concentrate.
My Gesha coffee plant at home has become my trusty sidekick in this pursuit, allowing me to tweak and refine my techniques. I’ve found that a slightly coarser grind and a longer steeping time can bring out the delicate floral notes that make my nitro cold brew truly sing. It’s a never-ending quest for perfection, but one that I’m passionate about sharing with fellow coffee enthusiasts.
Nitrogen Infusion Magic at Home
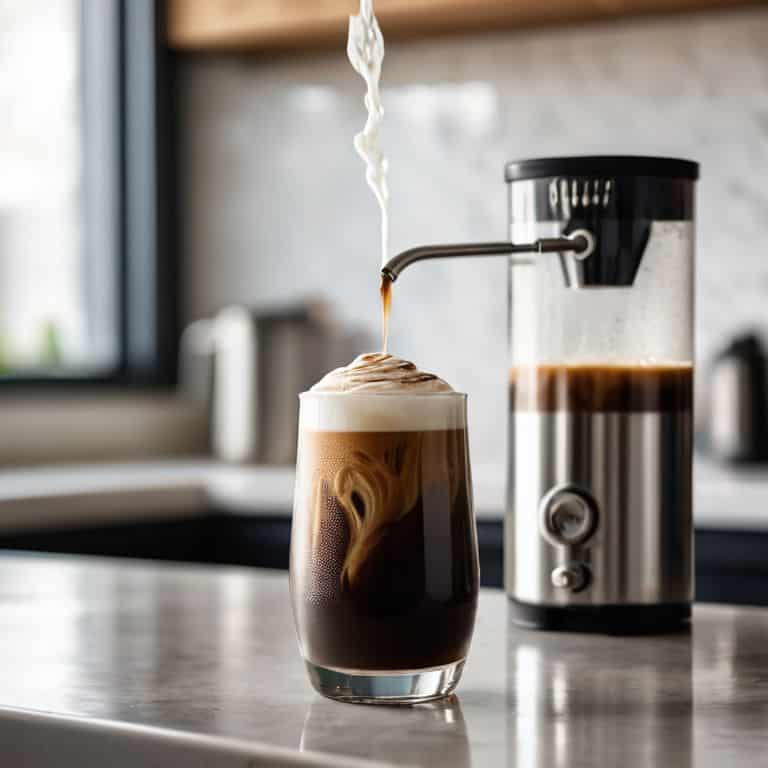
Now that we’ve unlocked the secrets of cold brew coffee concentrate, it’s time to dive into the mystical world of nitrogen infusion. I’m obsessed with the way nitrogen transforms the flavor and texture of our beloved cold brew. At home, you can replicate this magic using a nitro brew coffee dispenser or even a whipped cream dispenser as a DIY hack. The key is to charge your cold brew with nitrogen gas, which creates those mesmerizing cascading bubbles and an unmistakably silky texture.
As I experiment with nitrogen infusion, I’m constantly amazed by the depth of flavor it reveals in my cold brew. The subtle notes of chocolate and caramel become more pronounced, while the acidity is balanced to perfection. It’s a game-changer for any coffee enthusiast, and I’m excited to share my own tips and tricks for mastering nitrogen infusion at home. With a little practice, you’ll be crafting nitro cold brews that rival those of your favorite cafes.
Unlocking the Perfect Nitro Cold Brew: 5 Expert Tips
- Harmonize your cold brew coffee concentrate by using a 1:15 coffee-to-water ratio and steeping it for exactly 18 hours to bring out the optimal balance of flavors
- Select the right nitrogen charger for your nitro cold brew setup, ensuring it’s designed for food-grade use and can maintain a consistent pressure of 800-900 PSI
- Experiment with different coffee bean origins and roasts to find the perfect match for your nitro cold brew, as some beans will shine brighter with the added nitrogen infusion
- Pay attention to the serving temperature, as nitro cold brew is best enjoyed between 38°F and 42°F to preserve the delicate foam and flavor profile
- Invest in a high-quality coffee grinder that can produce a consistent grind size, as this will significantly impact the flavor extraction and overall quality of your nitro cold brew
Key Takeaways for the Nitro Cold Brew Rebel
I’ve found that the perfect cold brew coffee concentrate is all about the ratio of coffee to water – I swear by 1:4, and adjusting the grind size to suit my trusty vintage espresso machine
Infusing nitrogen into your cold brew at home is easier than you think, and it’s all about having the right tools and a bit of patience – I use a whip cream dispenser to get that silky smooth texture
For a truly transcendent nitro cold brew experience, don’t be afraid to experiment with different roast levels and water temperatures – I’ve discovered that a medium roast and water at exactly 92 degrees Celsius brings out the full flavor potential of my Gesha coffee plant’s beans
The Nitro Cold Brew Epiphany
The true art of making nitro cold brew at home lies not in the equipment, but in understanding the symbiotic dance between coffee and nitrogen – it’s a harmony that can elevate the mundane to the sublime, and I’m obsessed with helping you master it.
Julian Vale
Conclusion: Elevating Your Coffee Game
As we’ve explored the world of nitro cold brew, I hope you’ve grasped the fundamentals of creating exceptional coffee at home. From the initial steps of brewing your cold brew coffee concentrate to the magic of nitrogen infusion, each stage is crucial in producing a beverage that’s not only delicious but also visually stunning. By mastering the art of nitro cold brew, you’re not just making a drink; you’re crafting an experience that will leave your friends and family in awe. Remember, the key to perfection lies in the details, from the coarseness of your grind to the precision of your water temperature.
Now, as you embark on your own nitro cold brew journey, I want to leave you with a final thought: the pursuit of the perfect cup is a lifelong passion. It’s about experimentation, innovation, and a relentless drive for excellence in every brew. Don’t be afraid to push boundaries, try new techniques, and explore the vast world of coffee. With dedication and practice, you’ll find that the art of making nitro cold brew at home is not just about the coffee; it’s about the journey, the community, and the joy of sharing something truly special with others.
Frequently Asked Questions
What is the ideal coffee-to-water ratio for making cold brew coffee concentrate at home?
For me, the sweet spot is 1:4 to 1:6 coffee-to-water ratio. I’ve found that 1:5 yields a beautifully balanced concentrate, perfect for nitro cold brew. Experiment with ratios, but start with 1:5 – 60 grams of coffee to 300 grams of water – and adjust to your taste. Trust me, it’s a game-changer.
How do I ensure the nitrogen infusion process is safe and effective for making nitro cold brew?
To ensure safe and effective nitrogen infusion, I always use a whipping siphon or a dedicated nitro brew system, following the manufacturer’s guidelines to avoid over-pressurization. I also chill my cold brew concentrate to near-freezing temps before infusion, which helps to prevent foam overflow and guarantees a silky, velvety texture.
Can I use a regular whipped cream dispenser to infuse nitrogen into my cold brew, or do I need a specialized nitro cold brew machine?
Honestly, I don’t recommend using a regular whipped cream dispenser for nitro cold brew – the pressure and nitrogen flow aren’t optimized for coffee. You’ll want a specialized nitro cold brew machine or a dedicated nitrogen infusion kit to get that silky, velvety texture just right. Trust me, it’s worth the investment for a truly cafe-quality cup.