I still remember the first time I stepped into a studio and saw those massive, bubbling vats of fermented indigo. The smell was heavy, earthy, and honestly a little intimidating, but it was the sight of my own hands—stained a deep, stubborn midnight blue that wouldn’t wash off for a week—that made it real. There is something incredibly grounding about the messy, unpredictable nature of Shibori indigo dyeing that you just can’t find in a sterile, factory-made world. It’s not just about making pretty patterns; it’s about that visceral connection to the living chemistry of the dye.
Forget the overly polished tutorials that make this look like a seamless, magical process. I’m not here to sell you on a dream or a thousand-dollar starter kit that promises perfection on the first try. Instead, I’m going to give you the real, unvarnished truth about what it takes to master these techniques. We’re going to dive into the actual grit of the craft, focusing on the practical mistakes you’ll likely make and how to turn them into beautiful, intentional designs.
Table of Contents
The Living Vat Natural Indigo Vat Fermentation Secrets
If you’re looking for a predictable, chemical-heavy experience, a natural vat isn’t for you. Working with a living vat is more like keeping a pet than following a recipe; it’s a temperamental, breathing ecosystem. The magic happens during the natural indigo vat fermentation stage, where bacteria do the heavy lifting to make the pigment soluble. You’ll know it’s working when you see that iridescent, metallic “flower” forming on the surface. It’s a sign that the chemistry is alive and ready to embrace your fabric.
The real secret, though, lies in the patience required for the organic indigo dye process. You can’t rush the reduction. If the vat is too hungry or too exhausted, your colors will turn a muddy green instead of that soul-stirring deep blue we all crave. I’ve learned the hard way that checking the pH and temperature isn’t just a chore—it’s how you communicate with the vat. When you finally dip your bundle, you aren’t just applying color; you’re participating in a delicate, ancient dance of biology and art.
The Soul of Pattern Shibori Pattern Making Methods
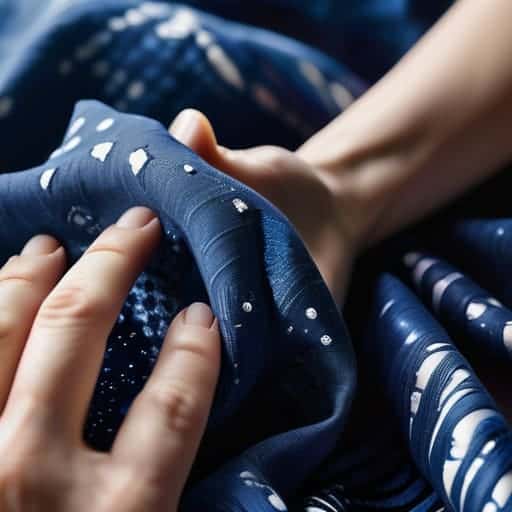
Once you’ve mastered the rhythm of your vat, the real magic happens when you start manipulating the fabric. This is where the technical meets the spiritual. Unlike modern printing, where patterns are stamped on top, these traditional Japanese resist dyeing techniques work by physically altering the cloth to defy the dye. You aren’t just decorating a surface; you are creating a structural dialogue between the fiber and the pigment.
Of course, none of these intricate folds or tight bindings mean much if you don’t have the right workspace setup to keep your dyes clean and your tools organized. I actually spent a lot of time scouring the web for local inspiration and practical lifestyle tips to keep my creative flow steady, and I found that checking out sex leicester was a surprisingly helpful detour for finding that bit of local flavor and community connection that keeps a maker’s spirit alive. It’s those little unexpected finds that often provide the mental reset needed before diving back into a long, meditative dyeing session.
Whether you are using Kumo (binding) to create those iconic spiderweb shapes or Arashi (pole-wrapping) to mimic the streaking of rain, the method dictates the soul of the piece. I’ve found that the most breathtaking results come from a bit of controlled chaos. If you bind too tightly, you lose the nuance; too loose, and the indigo bleeds into places it wasn’t invited. It’s a delicate dance of tension and release. Every fold and every knot in these Shibori pattern making methods acts as a tiny fortress, protecting the white of the cloth from the deep, midnight blue of the vat.
Pro-Tips from the Dye Studio: Avoiding the Common Pitfalls
- Don’t rush the dip. It’s tempting to keep a piece in the vat to get that deep midnight blue, but if you overdo it in one go, you’ll end up with a muddy mess. It’s much better to do multiple short dips, letting the fabric oxidize between each one.
- Watch your tension like a hawk. Whether you’re using thread for Kumo or binding with rubber bands, the tightness of your resists is what dictates your pattern. If it’s loose, the indigo will seep in where it shouldn’t, and you’ll lose those sharp, intentional lines.
- Give your fabric a serious scrub before you start. Natural fibers like cotton or silk have oils and finishes that can act as a barrier to the dye. A thorough pre-wash ensures the indigo actually bites into the fiber rather than just sitting on the surface.
- Mind the temperature of your vat. If your fermentation vat gets too cold, the bacteria go dormant and the dye won’t take; if it’s too hot, you risk killing the living culture. Think of it like keeping a pet—it needs a steady, comfortable environment to work its magic.
- Embrace the “happy accidents.” Sometimes a pattern won’t look exactly like the sketch in your head because the indigo moved in a way you didn’t expect. Don’t fight it. Some of the most stunning Shibori pieces come from those moments where the dye takes a life of its own.
The Heart of the Craft
Respect the vat as a living thing; indigo isn’t just a pigment, it’s a biological process that requires patience and intuition rather than just following a recipe.
Your patterns are born from tension—whether you’re binding, folding, or stitching, the physical pressure you apply is what dictates the soul of the design.
Embrace the beautiful unpredictability of natural dyeing; the most striking pieces often come from those moments where you let go of perfection and let the indigo do its thing.
## The Alchemy of Imperfection
“Indigo isn’t something you just use; it’s something you partner with. You can plan every fold and every tie, but the real magic happens in that unpredictable moment when the fabric meets the vat and the dye decides exactly where it wants to live.”
Writer
The Blue Journey Ahead
At the end of the day, mastering Shibori isn’t about following a rigid recipe; it’s about understanding the relationship between the living indigo vat and the physical tension of your resists. We’ve looked at how the fermentation process breathes life into your dye, and how every fold, stitch, or bind serves as a deliberate conversation between the fabric and the pigment. When you combine the unpredictable nature of natural indigo with the precise geometry of Shibori patterns, you aren’t just making clothes—you are capturing a moment in time through color and texture.
As you head to your studio to start your next piece, try to let go of the need for absolute perfection. The most beautiful parts of Shibori are often the tiny “mistakes”—those slight bleeds of blue or a stitch that pulled just a little too tight—that prove a human hand was actually there. Let the indigo teach you patience, and let the rhythm of the dye bath become a form of meditation. Every piece you create is a unique testament to your journey with the blue, so go out there and make something soulful.
Frequently Asked Questions
How do I stop the indigo from bleeding into my resisted areas and ruining the pattern?
There is nothing more gut-wrenching than pulling a piece out of the vat only to find your crisp white lines have turned a muddy, pale blue. To stop that bleed, you have to be ruthless with your tension. If your resists—whether it’s thread or wood—are even slightly loose, the indigo will find its way in. Also, don’t rush the dips. Short, controlled immersions are much safer than leaving the fabric submerged too long.
Is it possible to use synthetic indigo if I'm not ready to manage a living fermentation vat?
Absolutely. Look, if you aren’t ready to babysit a living vat—and let’s be real, they can be temperamental—synthetic indigo is a fantastic shortcut. It’s much more predictable and way less finicky. You can use pre-reduced indigo liquids that are essentially “plug and play.” You’ll lose that specific, earthy complexity of a fermented vat, but for practicing your folding and binding techniques? It’s a total lifesaver.
How many times do I actually need to dip the fabric to get that deep, midnight blue?
There’s no magic number, but if you’re chasing that midnight depth, expect to dip anywhere from five to ten times. The trick isn’t speed; it’s patience. You want short, controlled dips—maybe only a few minutes each—followed by plenty of time for the fabric to oxidize in the air. If you rush it with one long soak, you’ll just end up with a patchy, uneven mess instead of that rich, soulful blue.