If you’ve ever been sold a $199 “one‑click” miracle that claims to Biometric data purging for privacy with a single tap, you’re not alone—I’ve watched that pitch fizz out faster than a stale espresso shot left on a cold portafilter. The truth is, there’s no magic wand; it’s the same meticulous attention I give my grind size and brew temperature, only applied to the digital footprints we leave behind. Let’s scrap the hype, strip away the jargon, and start treating your facial scans, voice prints, and fingerprint hashes the way I treat every coffee bean: with exacting, hands‑on care.
In the next few minutes I’ll hand you a no‑fluff, step‑by‑step playbook that mirrors my espresso‑pull checklist: identify the data stores, calibrate your “temperature” (i.e., the right permissions), grind away unnecessary records, and finally rinse the system clean with verified deletion tools. You’ll see real‑world screenshots, command‑line snippets, and a short‑list of open‑source utilities that actually work, not just marketing hype. By the end, you’ll be able to execute a privacy‑grade purge with the same confidence I feel when I pull a shot that sticks to the portafilter like a perfect crema.
Table of Contents
- Pull a Clean Shot Biometric Data Purging for Privacy
- Dial in the Brew How to Delete Biometric Records
- Steep the Facts Privacy Implications of Facial Recognition Data
- Grind the Rules Master Gdpr Biometric Erasure
- Filter the Policy Understanding Biometric Data Retention Policies
- Serve the Finish Best Practices for Biometric Data Removal
- Pull a Clean Shot: 5 Espresso‑Strong Tips for Wiping Your Biometric Footprint
- Bottom‑Line Brew‑Notes
- The Clean Pull of Privacy
- Wrapping It All Up
- Frequently Asked Questions
Pull a Clean Shot Biometric Data Purging for Privacy

When I think about scrubbing a portafilter after a flawless espresso, I picture the same disciplined routine needed for a privacy‑first data cleanse. The moment you pull a shot, you check the pressure, the temperature, the grind size—everything must be in harmony. The same precision applies to GDPR biometric data erasure: you start by mapping the biometric data lifecycle management pipeline, identifying every point where a fingerprint template or facial map lands on your servers. From collection to storage, each stage should be logged like a shot timer, then flagged for deletion once the retention window closes. By following best practices for biometric data removal, you ensure no lingering “puck” of personal identifiers clogs your compliance grinder.
Now, let’s talk about the actual extraction of the data itself. Just as I would adjust the tamp pressure to avoid channeling, you must respect the biometric data retention policies that dictate when a record becomes “stale.” The real art is in the how to delete biometric records step: issue a secure, irreversible wipe command, verify the hash is gone, and then audit the process like a barista double‑checking brew ratios. Ignoring the privacy implications of facial recognition data is like serving under‑extracted coffee—customers notice the bitterness, and regulators will notice the gaps. A clean, documented purge leaves your system as crisp as a well‑pulled espresso crema.
Dial in the Brew How to Delete Biometric Records
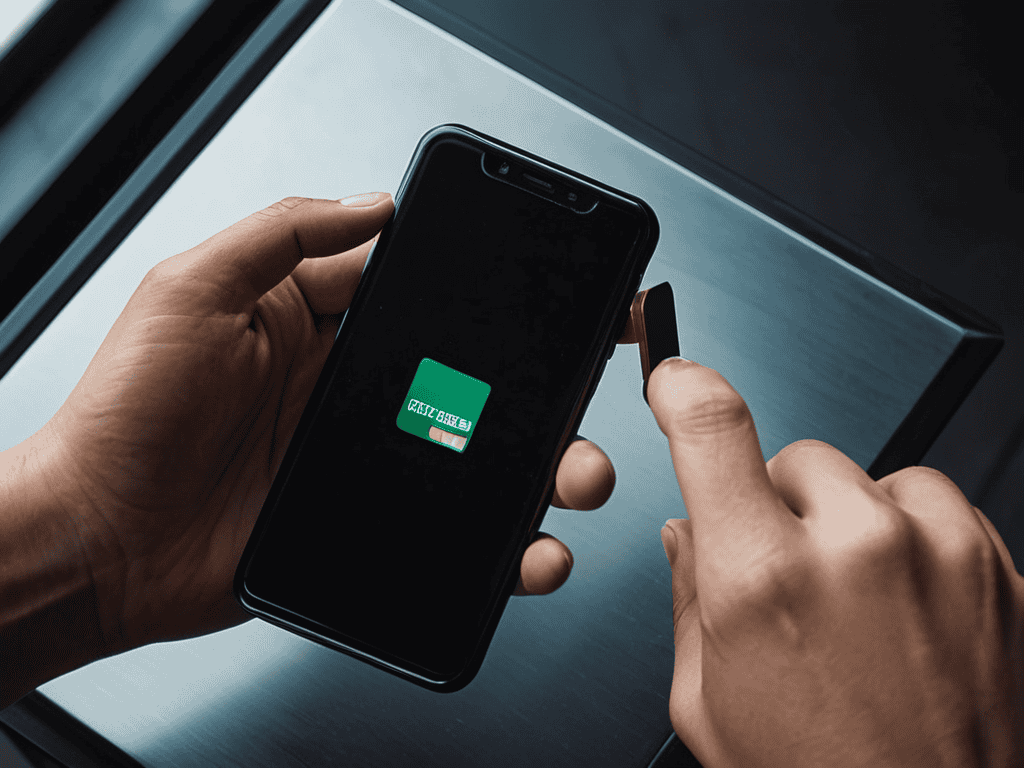
First, think of your biometric vault as a portafilter loaded with stale grounds. To start the purge, locate the settings menu where the “Delete All Biometric Data” toggle lives—usually tucked under privacy or security. Before you press, note the extraction curve of your request: a single tap will trigger a full sweep, wiping fingerprints, facial maps, and voice prints from the device’s secure enclave. This is the equivalent of pulling a shot with a freshly calibrated grinder—no old particles left to contaminate the next brew.
If you’ve ever felt the frustration of a stubborn espresso puck that just won’t release, you’ll understand why I keep a tiny, printable cheat‑sheet on my barista wall—think of it as the “espresso‑extraction checklist” for privacy, a single‑page PDF that walks you step‑by‑step through the GDPR‑mandated “right to erasure” for facial‑scan logs, voiceprints, and keystroke patterns; the document even includes a handy spreadsheet template for logging your request timestamps, so you can track every grind of the process with the same precision I use when timing a 25‑second shot, and for those who like a bit of extra community support, the same site that hosts the checklist also hosts a lively forum where fellow privacy‑savvy Australians share their experiences—just follow the link to the australian swingers page and you’ll find the download waiting in the “Resources” tab, ready to help you brew a truly clean data profile.
Once the sweep finishes, verify the clean slate by revisiting the biometric log—most OSes will now display “No records found.” For extra peace of mind, run a clean purge of cached data; think of it as rinsing the group head with hot water after a latte. Your device is now ready for a fresh, privacy‑first extraction.
Steep the Facts Privacy Implications of Facial Recognition Data
Think of a facial‑recognition template as a shot pulled from a bean you never planted. Once the algorithm extracts the 3‑D map of your cheekbones, it leaves a lingering biometric residue on every cloud server that ever glanced at your face. That residue—pixel‑perfect vectors—can be recombined, sold, or weaponized without your consent, turning a harmless selfie into a permanent fingerprint in the data‑brew.
Because that brew never cools, the implications ripple into surveillance, profiling, and even employment decisions. Each time a retailer scans your grin for a loyalty discount, they’re siphoning a tiny shot of your identity, storing it alongside purchase history. The only way to protect the privacy crema—the frothy layer of consent that should sit atop every extraction—is to scrub the source: delete the stored templates, revoke camera permissions, and demand transparent data‑retention policies before the next brew.
Grind the Rules Master Gdpr Biometric Erasure

In the EU framework, GDPR treats biometric identifiers the same way I treat a fresh dose of espresso: with strict timing and exact parameters. The moment a user withdraws consent, you’re required to initiate GDPR biometric data erasure faster than a 25‑second brew cycle, tracing the data through every stage of the biometric data lifecycle management pipeline—collection, storage, processing, and finally, secure deletion. Think of each record as a coffee bean: once the shot is pulled, any residue left in the portafilter must be flushed out, otherwise the flavor (or privacy) is compromised.
So, how to delete biometric records without leaving a bitter aftertaste? Start with a written biometric data retention policy that spells out the exact retention window—usually 30 days after the purpose is fulfilled, just like I set a timer for a single‑origin pour‑over. Then, automate the purge using encrypted wipe scripts that meet the best practices for biometric data removal checklist: verify the hash, log the deletion timestamp, and archive the audit trail for compliance. This disciplined routine guarantees that the data disappears as cleanly as a perfectly rinsed portafilter.
Filter the Policy Understanding Biometric Data Retention Policies
When I start parsing a company’s policy grind, I treat the retention schedule like a coffee‑to‑water ratio: every extra day of storage is a stray grain that can throw the whole brew off balance. Most GDPR‑compliant statutes require you to declare a clear data retention window, meaning the moment your facial‑scan or fingerprint is no longer needed, the clock starts ticking. I always ask myself: “Do we really need to keep that iris scan for 365 days, or can we brew it out after the first 30?” By mapping the legal timetable onto a simple espresso timer, you can spot where the policy over‑extracts and where you can pull a cleaner, tighter shot of compliance.
Once the window is set, the next step is to audit the “filter” clause that dictates how the data is actually discarded. A robust policy will specify a secure deletion method—think of it as a pressure‑flush that leaves no residue in the portafilter. If the document only mentions “securely erase,” you’ll want to demand specifics: AES‑256 wiping, verifiable logs, and a final “puck‑out” confirmation that the biometric bits have truly been ground out of your system. This level of detail transforms a vague statement into a concrete, repeatable step you can test and perfect.
Serve the Finish Best Practices for Biometric Data Removal
First, treat your biometric inventory like a coffee bean stocktake. List every system—HR portals, security badges, mobile apps—and note which fingerprints, facial scans, or voice prints they hold. Issue a formal GDPR ‘right to be forgotten’ request to each vendor, demanding a clean extraction of the data within the statutory 30‑day window. Keep a record of every submission; this serves as your brew log and proof of compliance.
After the data is purged, verify the cup is truly empty. Run a follow‑up request for a confirmation certificate and compare it against your log—think of it as tasting the espresso for a smooth pour before serving. Schedule quarterly sweeps of all biometric repositories, wiping any stray residues before they can stale. Finally, encrypt residual logs and store them in a vault‑grade, air‑gapped archive, so future audits taste as fresh as a single‑origin brew.
Pull a Clean Shot: 5 Espresso‑Strong Tips for Wiping Your Biometric Footprint
- Pre‑heat your data pipeline – audit every device, app, and service for stored facial, fingerprint, or voice prints before you start the purge.
- Grind the permissions fine – use privacy settings to revoke camera, microphone, and biometric access for every account, just as you’d dial‑in grind size for a perfect espresso.
- Brew with a double‑shot of deletion – request a formal data‑erasure certificate from each provider, then verify the “brew time” by confirming the records are truly gone.
- Filter out the residue – run a “privacy espresso shot” by scanning your digital footprint with a reputable data‑audit tool, ensuring no lingering biometric crumbs remain.
- Serve the finish with a seal – enable two‑factor authentication that relies on passwords or authenticator apps, so your next “brew” stays biometric‑free and secure.
Bottom‑Line Brew‑Notes
Treat biometric erasure like a shot‑pull—schedule regular “clean‑out” cycles, verify each data source, and log the purge for audit‑ready transparency.
Master the “temperature” of consent—ensure users explicitly opt‑in before collection, and give them a clear, one‑click “reset” to delete their biometric imprint.
Filter your policies through GDPR’s fine grind—retain only the minimal data needed, set strict retention timers, and document every step to stay compliant.
The Clean Pull of Privacy
“Erasing your biometric footprints is like pulling a flawless espresso—every stray trace stripped away, leaving only the pure crema of control.”
Julian Vale
Wrapping It All Up

Through this guide I’ve walked you through the espresso‑style workflow for wiping your digital fingerprints: first, locate every data source that’s been grinding your facial scans, voice prints, or palm prints into bean‑bag; then perform a precise audit—think of it as weighing your dose to the gram—so you know exactly how much you must purge. Issue a formal deletion request, timing it like a pre‑infusion bloom, and cite the GDPR’s right to erasure, which forces companies to filter out the data after the mandated retention period. Finally, adopt a best‑practice routine of documenting each request, monitoring the confirmation, and scheduling a regular “clean‑shot” audit. In short, treat data erasure with the same meticulous care you give a double‑shot, and you’ll end up with a clear crema of clean shot of privacy.
Having mastered the extraction, it’s time to savor the result: a brew of confidence that no hidden biometric residue can spoil. By regularly grinding your own privacy routine—setting reminders to audit permissions, refreshing consent, and repeating the deletion process whenever a new service asks for a scan—you’ll keep the crema thick and the bitterness at bay. Remember, every clean shot you pull on your data is a small rebellion against the over‑extraction of surveillance. So, brew with intention, sip the freedom of a privacy‑pure cup, and let the aroma of control fill your kitchen.
Frequently Asked Questions
How can I verify that my facial recognition data has been completely removed from a company's servers?
First, request a formal data‑erasure report just like you’d ask a roaster for a batch sheet. Ask the company to confirm the exact timestamp, hash ID, and storage location of the facial template they held. Then demand a signed certificate that the record has been overwritten with a cryptographic “null” (all zeros) and that any backup copies have been purged. Finally, monitor your account for any re‑prompting for facial login—if they never ask again, the brew is truly clean.
What specific steps should I take to request biometric data erasure under GDPR, and what timelines should I expect?
First, locate your data‑controller—think of it as finding the café that roasted your beans. Draft a concise “erasure request” email: state you’re invoking GDPR Art. 17, list the biometric data (e.g., facial scans, fingerprints) you want removed, and attach proof of identity (a passport scan, not your fingerprint). Send it to their privacy officer, then log the timestamp. They must reply within 30 days; if they need time, they can ask for a two‑week extension, but must inform you.
Are there reliable tools or services that can help me audit and purge my biometric footprints across multiple platforms?
Absolutely—think of a good espresso machine as your biometric audit rig. Start with Robust Privacy Manager (formerly “Jumbo”), which scans face‑ID, voice, and fingerprint caches on iOS and Android, then spits out a clean‑up script. For deeper dives, try Revoker.io; its API pulls records from cloud services (Google, Facebook, Amazon) and issues delete requests automatically. Pair these with the open‑source Data‑Sweeper CLI for manual tweaks, and you’ll be pulling a spotless shot of privacy every day.