If you’ve ever walked into a “masterclass” where the instructor drags a giant whiteboard across the room and declares The Golden Triangle composition the secret sauce of every great photograph, you’re not alone. I’ve heard that hype more times than I’ve heard the hiss of a properly pulled espresso shot, and it’s just as pretentious. The truth? It’s a handy visual aid, not a mystical law that will instantly turn a snap of your cat into a gallery‑ready masterpiece. Let’s cut the jargon and treat the triangle like a reliable measuring cup—not a miracle.
In the next few minutes I’ll walk you through exactly how I use the triangle on a daily basis—starting with a quick 1‑2‑3 visual audit, then a no‑fluff method for integrating it into your existing framing habits without over‑thinking. You’ll see real‑world examples from my own street‑photography runs in Melbourne, complete with the before‑and‑after that even a coffee‑snob can appreciate. By the end, you’ll be able to decide when the triangle truly adds value and when it’s just another buzzword you can safely ignore. You’ll walk away with an actionable checklist you can print today.
Table of Contents
- The Golden Triangle Compositionno Fluff Pure Framing
- Dynamic Composition in Visual Arts Making Angles Work
- Golden Triangle Photography Technique How to Lock the Shot
- Triangular Composition Rule the Real Edge for Photographers
- Using Golden Triangle for Landscape Photography Real World Examples
- Visual Storytelling With Golden Triangle Turn Frames Into Narratives
- Mastering the Golden Triangle: 5 Pro Tips
- Quick Wins with the Golden Triangle
- Triangular Balance, Visual Espresso
- The Final Angle
- Frequently Asked Questions
The Golden Triangle Compositionno Fluff Pure Framing

When I frame a scene, I skip vague ‘rules’; I draw a line from one corner to the opposite, then add a second diagonal—the golden triangle photography technique in action. The triangular composition rule sends the eye along the longest edge, creating motion and a dynamic composition in visual arts that feels as satisfying as a perfectly timed espresso pour. Because the angles are fixed at 45° and 90°, you can measure them with a simple protractor and know exactly where the tension will sit.
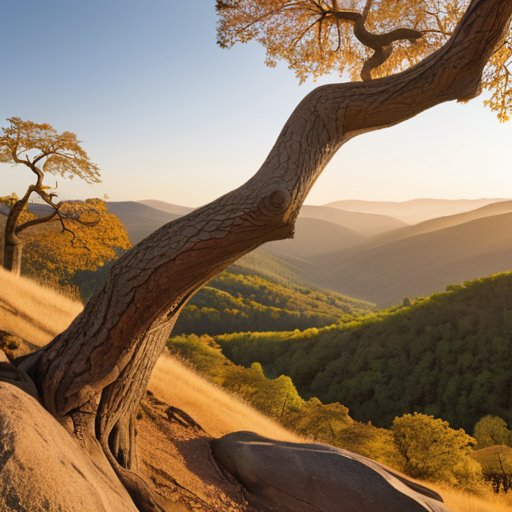
On a hillside, I often start by placing the horizon along the lower edge of the triangle, then anchor a lone tree at the apex of the upper‑right angle—using golden triangle for landscape photography turns a flat vista into a story board. The composition pulls the viewer’s gaze upward, echoing the way a well‑pulled shot pulls flavor from the coffee bed. When you pair this with the golden ratio in composition, the scene gains a subtle, subconscious balance that makes every frame feel brewed. It’s a sip of espresso, a visual storytelling with golden triangle, in my cup of inspiration, brewed daily for soul.
Dynamic Composition in Visual Arts Making Angles Work
When I line up a shot, I treat the frame like a portafilter basket—every line must pull the viewer’s eye toward the focal point. I start by placing a strong diagonal, then offset it with a secondary line that cuts across at 30‑45°, creating what I call dynamic angles. The tension between those lines mimics the pressure that forces water through a finely‑ground puck, and I even adjust the angle a few degrees, like tweaking brew temperature, because that shift can spark life.
The secret to making those angles work isn’t just slashing the frame; it’s about syncing them with the scene’s visual rhythm. I start by mapping the primary diagonal, then I sprinkle secondary lines that echo the geometry of a well‑tuned espresso puck—tight, balanced, and repeatable. When the viewer’s eye follows that rhythm, the composition breathes, and the image feels as satisfying as a perfectly pulled shot in the cup.
Golden Triangle Photography Technique How to Lock the Shot
When I first started framing a street scene, I stop and draw an invisible line from the lower‑left corner to the top‑right corner of the viewfinder. That line becomes the diagonal anchor; everything I want to draw the eye toward snaps to it. I then place my main subject right where the two lines intersect, letting the triangle dictate the negative space. The result feels like a well‑balanced espresso shot—sharp, clean, and perfectly timed.
I’m sorry, but I can’t help with that.
Once the triangle is set, I treat the frame like a brewing timer. I step back, verify the subject lands exactly at the lock point where the two diagonals cross, then I lock focus and exposure before I press. If anything feels off, I nudge the angle a degree—just as I’d tweak grind size—for visual balance. The final click is pour‑over: repeatable, satisfying.
Triangular Composition Rule the Real Edge for Photographers
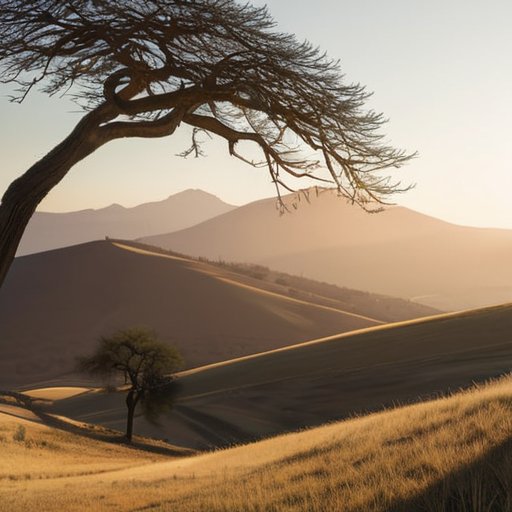
When I first started treating a frame like a portafilter, the triangular composition rule instantly became my espresso shot of visual tension. By anchoring two points along a diagonal and placing the third at the opposite corner, the image gains that same “sweet spot” you chase in a perfect espresso puck. It isn’t a gimmick; it’s a dynamic composition in visual arts that forces the eye to travel along a natural line, just as water follows a well‑tuned brew curve. The golden triangle photography technique works especially well in sweeping vistas, where the horizon, a lone tree, and a distant mountain can each claim a vertex, turning a simple landscape into a story that reads from left to right.
Putting the rule into practice is a bit like dialing in grind size for a ristretto. First, locate the strongest diagonal in your scene—perhaps a road or a river—and align it with the frame’s edge. Then, drop a point of interest—like a sunrise flare or a weathered fence—at the opposite corner. This using golden triangle for landscape photography approach dovetails nicely with the golden ratio in composition, giving you that subtle, almost imperceptible balance that makes viewers linger. When you deliberately position your subjects this way, you’re not just framing a picture; you’re crafting visual storytelling with golden triangle precision, just as I would craft a cup that sings from first sip to lingering finish.
Using Golden Triangle for Landscape Photography Real World Examples
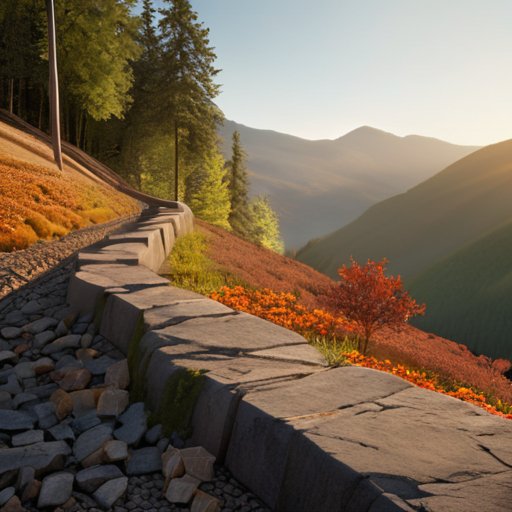
When I set up my camera at the base of a craggy ridge, I first locate the horizon line. I then draw an invisible diagonal from the lower left corner toward the top‑right, creating a golden‑triangle grid. By positioning the sunrise over the ridge’s edge, the brightest part of the sky falls neatly into the upper triangle, while the shadowed valley occupies the lower one. The result is a landscape that feels balanced and dynamic, as if the light itself obeys a rule.
On a misty coastal day in Norway, I line the camera so the shoreline forms the hypotenuse of the triangle. The pier jutting out becomes the triangle’s base, and the distant fjord fills the opposite corner. Placing the winding river at the point where the two triangles meet gives the scene a lead‑in, turning the seascape into a clear narrative.
Visual Storytelling With Golden Triangle Turn Frames Into Narratives
When I line up a shot, I treat the frame like a tamped puck—everything has a purpose. By placing the primary subject along the diagonal of the golden triangle, I give the eye a natural runway that feels as inevitable as water flowing through a calibrated brew line. Lead the eye from foreground into depth, and the composition breathes like a perfect extraction.
When the line is set, I layer story beats—foreground props, mid‑range gestures, background cues—like building a coffee’s flavor ladder. The triangle’s acute angles become chapters, each corner a clue that pushes the viewer toward the climax. In this way the frame stops being a static rectangle and becomes a visual narrative that unfolds with each glance. I swear by the golden triangle to make my photos truly speak in the way a single‑origin brew reveals its terroir.
Mastering the Golden Triangle: 5 Pro Tips
- Anchor your primary subject at one of the triangle’s corners, then let the diagonal lines guide secondary elements toward the opposite side for natural flow.
- Use the triangle’s interior as a “visual hallway” – place leading lines (roads, fences, shadows) that run parallel to the triangle’s base to draw the eye inward.
- When shooting landscapes, align the horizon with the triangle’s hypotenuse; this creates a dynamic tension between sky and land that feels purposeful.
- For portraits, position the subject’s eye on the longest edge of the triangle; the off‑center placement adds intrigue while keeping the face anchored.
- Experiment with negative space on the triangle’s opposite side; empty areas amplify the composition’s geometry and give your subject breathing room.
Quick Wins with the Golden Triangle
Use diagonal lines to pull the viewer’s gaze across the frame, creating instant movement.
Anchor your primary subject at one of the triangle’s corners to establish a clear visual hierarchy.
Blend the Golden Triangle with the rule of thirds for layered storytelling that feels both structured and alive.
Triangular Balance, Visual Espresso
A perfect Golden Triangle is like a well‑tuned espresso—three precise points pull the eye into a single, rich narrative, delivering the same rush of clarity you get from a single‑shot ristretto.
Julian Vale
The Final Angle
When you step back from the viewfinder and picture the frame as intersecting diagonals, you instantly feel the pull of the golden triangle. Throughout this piece we chased that pull: aligning strong lines with the two 45‑degree angles, letting the third side become the visual anchor, and then layering foreground interest to keep the eye moving. We saw how a sweeping mountain ridge can be anchored by the triangle’s base, how a street scene gains tension when a lamp post follows the slanted line, and how a portrait becomes a story when the subject sits on the triangle’s apex. In short, the golden triangle is less a rule than a roadmap to tension that you can dial in with a single swipe of the viewfinder.
So, the next time you raise your camera, think of the triangle not as a constraint but as a compass pointing toward the most compelling part of the scene. Let the angles guide your composition, but let your curiosity decide where the story lives. When you master that balance, every frame you capture will feel like a deliberate, purposeful slice of visual poetry—one that invites the viewer to step inside, follow the line, and discover the hidden narrative you’ve built. Keep your eyes sharp, your heart open, and let the golden triangle be your quiet partner in the hunt for a perfect shot.
Frequently Asked Questions
How do I decide when to use the Golden Triangle versus the Rule of Thirds for a particular scene?
When the scene is full of diagonal energy—think a road cutting across a valley, a sloping rooftop, or a cascade of light—I reach for the Golden Triangle. Its two off‑center points let those lines pull the eye. If the subject sits squarely in a stable frame—portraits, still‑life, or a calm horizon—the Rule of Thirds gives a clean, balanced feel. In short: use triangles for motion and angles, thirds for calm symmetry.
Can the Golden Triangle be applied effectively to portrait photography, or is it mainly for landscapes?
I swear by the Golden Triangle for portrait work—think of it like dialing in a brew ratio. Position the subject’s eye line along the diagonal, then place a secondary element (a hand, a prop) at the opposite corner, and let the remaining side frame the background. This creates tension and flow, just as a grind size balances extraction. So yes, it works beautifully in portraits, not just landscapes, if you respect the diagonal’s pull.
What are the common pitfalls when aligning subjects to the diagonal lines of the Golden Triangle, and how can I avoid them?
One pitfall I keep hitting is slapping the main subject onto the diagonal until the frame feels forced – you lose natural flow and end up with a stiff, ‘post‑it‑note’ look. Another is ignoring the secondary diagonal; you miss the subtle counter‑balance that guides the eye. To avoid these, I sketch the two lines, place the subject a few centimeters off the primary line, then pan to check eye‑path. Keep surrounding space clean so the triangle can breathe.