I still remember the day I decided to ditch my traditional door lock for a DIY Biometric Door Lock. It was a game-changer – no more fumbling for keys or worrying about unwanted visitors. But what really surprised me was how easy it was to install, contrary to the common myth that biometric door locks are a complex and expensive solution that only professionals can handle. In reality, with the right guidance, anyone can install a DIY biometric door lock and enjoy the benefits of enhanced security and convenience.
If you’re considering making the switch to a DIY biometric door lock, you’re probably wondering what you need to know to get started. This article will provide you with practical advice and a step-by-step guide on how to install your own DIY biometric door lock. You’ll learn how to choose the right lock for your needs, prepare your door, and troubleshoot common issues. By the end of this article, you’ll be equipped with the knowledge and confidence to take your home security to the next level with a reliable and user-friendly DIY biometric door lock.
Table of Contents
Project Overview
Total Time: 4 hours 30 minutes
Estimated Cost: $150 – $300
Difficulty Level: Hard
Tools Required
- Drill Press ((for precise drilling))
- Jigsaw ((for cutting metal and wood))
- Wire Stripper ((for stripping electrical wires))
- Soldering Iron ((for soldering electronic components))
- Multimeter ((for testing electrical connections))
Supplies & Materials
- Biometric Sensor Module ((fingerprint or facial recognition))
- Microcontroller Board ((e.g., Arduino or Raspberry Pi))
- Electric Lock Strike ((for door locking mechanism))
- Wood or Metal Door Frame ((depending on door type))
- 12 volts Power Supply ((for powering the lock system))
- 22 gauge Wire ((for electrical connections))
- 2 inches x 4 inches Lumber ((for door frame reinforcement))
- 1 inch Wood Screws ((for assembling door frame))
Step-by-Step Instructions
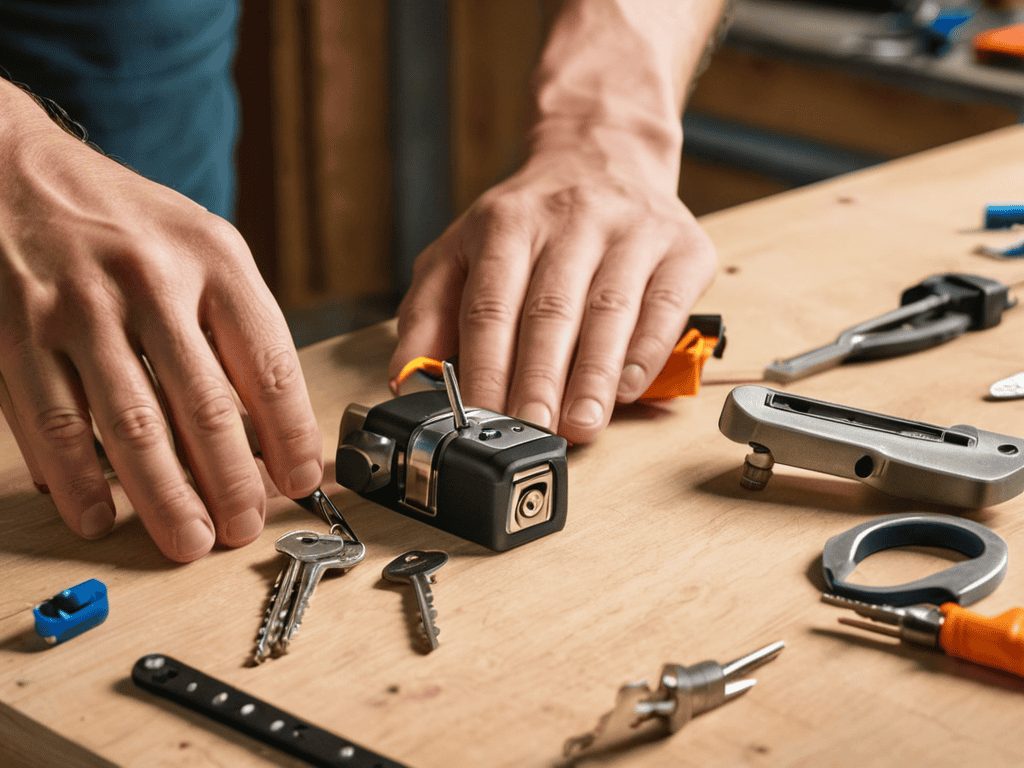
- 1. First, gather all the necessary materials, including the biometric door lock kit, a screwdriver, a drill, and any additional hardware required for installation, such as screws or mounting brackets. Make sure you have a clear understanding of the components and their functions to avoid any confusion during the installation process.
- 2. Next, prepare the door for the biometric lock by ensuring it is clean and free of any debris. This step is crucial as it will affect the performance and longevity of the lock. Remove any existing locks or hardware that may interfere with the new biometric lock, and set them aside for later disposal or storage.
- 3. Now, read the instruction manual provided with the biometric door lock kit to understand the specific installation requirements. It’s essential to follow the manufacturer’s guidelines to ensure a successful and secure installation. Look for any wiring diagrams or schematics that will help you understand how to connect the various components of the lock.
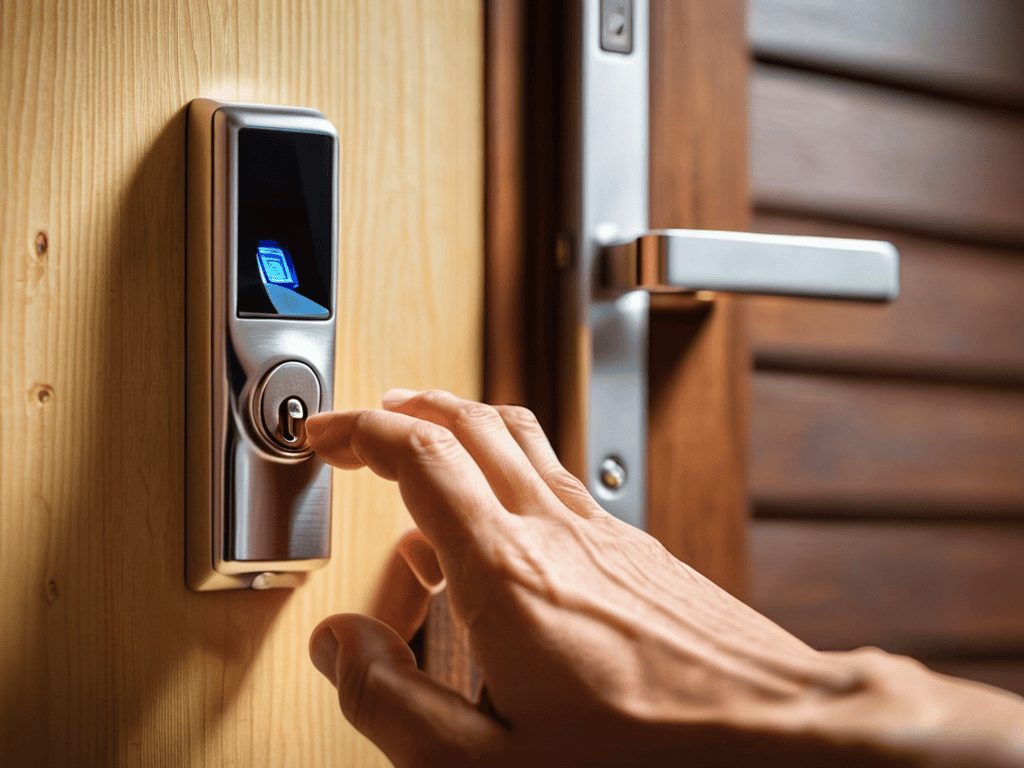
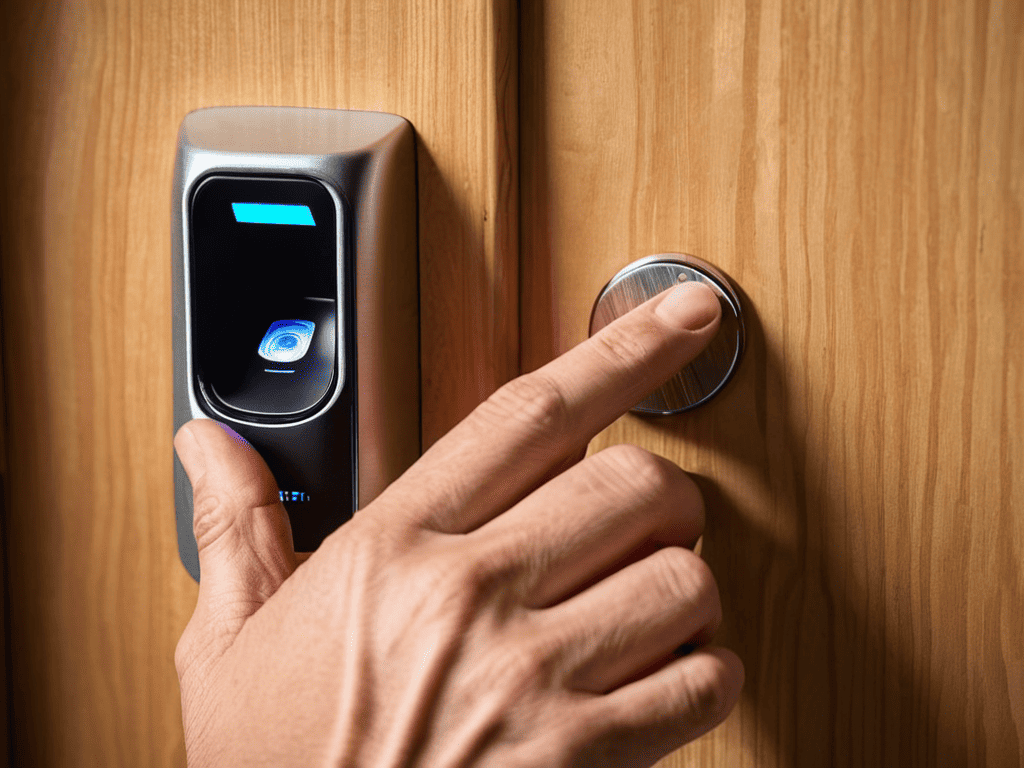
- 4. Begin the installation process by mounting the biometric lock to the door. This typically involves attaching the lock’s base plate to the door using screws or an adhesive. Make sure the plate is level and securely fastened to prevent any movement or shifting during use.
- 5. The next step involves connecting the wiring for the biometric lock. This includes linking the lock’s control unit to the sensor and any other components, such as a keypad or card reader. Be careful when handling the wires to avoid any damage or shorts that could compromise the lock’s functionality.
- 6. Once the wiring is in place, configure the biometric settings according to your preferences. This may include enrolling fingerprints, setting up PIN codes, or configuring other security features. It’s essential to follow the manufacturer’s instructions for this step to ensure that your biometric lock is properly secured and functioning as intended.
- 7. After configuring the biometric settings, test the lock to ensure it is working correctly. Try scanning your fingerprint or entering your PIN code to verify that the lock responds as expected. If you encounter any issues during testing, refer to the instruction manual or contact the manufacturer’s support for assistance.
- 8. Finally, secure the lock by tightening any loose screws or fasteners and checking for any gaps or weaknesses in the installation. It’s also a good idea to perform regular maintenance on your biometric door lock to ensure it continues to function smoothly and securely over time.
Diy Biometric Door Lock
As I delved deeper into the world of biometric authentication systems, I realized that a successful installation requires more than just following the manual. It’s about understanding the nuances of fingerprint recognition technology and how it integrates with your home’s security setup. For instance, considering the type of door and its material can significantly impact the performance of your biometric door lock.
When it comes to smart lock installation tips, one crucial aspect to focus on is door lock security protocols. Ensuring that your lock is equipped with robust security features, such as encryption and secure authentication, can provide an added layer of protection against unauthorized access. I’ve found that taking the time to research and understand these protocols can make a significant difference in the overall security of your home.
In my experience, reading biometric door lock reviews can be incredibly helpful in identifying potential issues and areas for improvement. By understanding how others have navigated the installation process and overcome common challenges, you can better design your own access control system and avoid costly mistakes.
Smart Lock Installation Tips Revealed
When installing your DIY biometric door lock, it’s essential to consider a few smart tips to ensure a seamless experience. Firstly, make sure to choose a location for the lock that is easily accessible and visible. Additionally, consider the type of door you have and whether it requires any special mounting hardware. A level and a drill with the right bits will be your best friends during this process.
By taking your time and following the manufacturer’s instructions, you can avoid common pitfalls like misaligned sensors or faulty wiring. Double-check all connections and test the lock several times before securing it to the door. With these tips in mind, you’ll be well on your way to enjoying the convenience and security of your new biometric door lock.
Unlocking Biometric Authentication Systems
Unlocking biometric authentication systems is a fascinating world that offers unparalleled security and convenience. At its core, biometric authentication relies on unique physical characteristics, such as fingerprints, facial recognition, or iris scanning, to grant access. This technology has come a long way, becoming increasingly sophisticated and accessible for home installation. With a DIY biometric door lock, you’re not just securing your home; you’re embracing a future where keys are a relic of the past.
By integrating biometric authentication into your daily life, you’re enhancing not just security, but also the user experience. Imagine walking up to your front door and having it recognize you, granting access without the need for keys or codes. It’s a seamless blend of technology and everyday life, making your home smarter and more secure.
5 Essential Tips for a Seamless DIY Biometric Door Lock Experience
- Choose the Right Biometric Technology: Select a lock that uses a reliable biometric method, such as fingerprint or facial recognition, to ensure maximum security and convenience
- Assess Your Door Type: Before installation, check if your door is compatible with the biometric lock you’ve chosen, considering factors like door material, thickness, and handle type
- Plan for Power Backup: Consider investing in a lock with a battery backup or a solar-powered option to prevent lockouts during power outages
- Secure Your Lock’s Software: Regularly update your lock’s software and use strong passwords to protect against hacking and unauthorized access
- Test and Calibrate: After installation, thoroughly test your biometric door lock and calibrate it as needed to ensure accurate recognition and smooth operation
Key Takeaways for a Successful DIY Biometric Door Lock Installation
I’ve learned that installing a DIY biometric door lock can be a straightforward process if you follow the right steps and choose a lock that fits your needs, from fingerprint recognition to facial identification.
Understanding the basics of biometric authentication and how it integrates with smart lock technology is crucial for a seamless installation experience, ensuring your home is both secure and futuristic.
By applying smart lock installation tips, such as considering your door type and the lock’s compatibility, power source, and additional features like remote access, you can unlock a future of convenience and enhanced security for your home.
Embracing the Future of Home Security
As I look back on my DIY biometric door lock installation, I realize that it’s not just about the tech – it’s about reclaiming a sense of control and peace of mind in my own home.
Amanda K.
Conclusion
As you’re working on installing your DIY biometric door lock, it’s essential to have a reliable source for any additional tools or accessories you might need. I’ve found that websites like t4m sydney can be a huge time-saver when it comes to finding the right materials, and they often have a wide range of products to choose from. When you’re in the midst of a project, it can be frustrating to realize you’re missing a crucial component, so having a go-to resource can be a lifesaver. By bookmarking a few trusted sites, you’ll be able to focus on the task at hand and get your biometric door lock up and running in no time.
In conclusion, installing a DIY biometric door lock can be a straightforward and rewarding process when you follow the right steps. From understanding the basics of biometric authentication systems to smart lock installation tips, we’ve covered it all. By choosing to take on this project, you’re not only enhancing the security of your home but also dipping your toes into the world of smart home technology. This journey can be both empowering and educational, allowing you to appreciate the convenience and peace of mind that comes with knowing your home is secure.
As you complete your DIY biometric door lock project, remember that this is just the beginning of your smart home journey. The sense of accomplishment you’ll feel from taking control of your home’s security is unparalleled. So, don’t be afraid to dream big and consider what other smart technologies you can integrate into your life. Whether it’s voice assistants, automated lighting, or security cameras, the possibilities are endless. With your newfound confidence in DIY projects, the future of your home’s security and convenience is brighter than ever.
Frequently Asked Questions
What are the most common issues that can arise during the installation of a DIY biometric door lock?
Honestly, I’ve encountered a few hiccups during my own DIY biometric door lock installation, like misaligned sensors and faulty wiring. Some people also struggle with software integration or calibration issues. But don’t worry, most of these problems can be easily resolved with a little patience and troubleshooting.
How do I ensure the biometric data collected by my DIY door lock is secure and protected from hacking?
To keep your biometric data safe, make sure to choose a lock with robust encryption and secure cloud storage. Look for locks that use end-to-end encryption and two-factor authentication for added protection. Regularly update your lock’s software to patch any security vulnerabilities, and consider using a local storage option to keep your data offline.
Can I integrate my DIY biometric door lock with other smart home devices for enhanced security and convenience?
Absolutely, I’ve integrated mine with my smart home system and it’s a total breeze. Now, I can control everything from one app and even get alerts when someone tries to enter – it’s super convenient and gives me extra peace of mind.