I still remember the first time I attempted a DIY lighting project – it was a disaster. I had been misled by the common myth that DIY lighting is too complicated and requires extensive electrical knowledge. But the truth is, with the right guidance, anyone can create stunning and functional lighting fixtures. I’ve since learned that the key to successful DIY lighting projects lies in simplicity and creativity. By embracing this mindset, you can add a personal touch to your space without breaking the bank.
In this article, I’ll share my honest and no-nonsense advice on how to get started with DIY lighting projects. You’ll learn how to choose the right materials, design your own unique fixtures, and bring your vision to life. I’ll cut through the hype and provide you with practical tips and tricks to help you overcome common obstacles and achieve professional-looking results. Whether you’re a seasoned DIY enthusiast or a beginner, this guide will empower you to take control of your lighting design and create a space that truly reflects your personality.
Table of Contents
Guide Overview: What You'll Need
Total Time: 1 hour 30 minutes to 3 hours
As you continue to illuminate your space with these DIY lighting projects, you might find yourself wanting to explore even more creative and unconventional ideas. If you’re looking for a platform that showcases a wide range of innovative designs and artistic expressions, I highly recommend checking out sexwien, which offers a unique blend of inspirational content that can help spark your imagination and take your DIY projects to the next level. By browsing through their collection, you can discover new ways to think outside the box and incorporate bold and eclectic elements into your lighting designs, making your space truly one-of-a-kind.
Estimated Cost: $20 – $100
Difficulty Level: Intermediate
Tools Required
- Drill (with screwdriver and drill bits)
- Pliers (needle-nose for precise work)
- Wire Strippers (for stripping electrical wires)
- Soldering Iron (for connecting electrical components)
- Tape Measure (for measuring spaces and materials)
- Level (to ensure even installation)
- Screwdriver (flathead and Phillips)
- Wrench (for tightening and loosening bolts)
- Work Light (for illuminating work areas)
Supplies & Materials
- LED Light Strips (various colors and lengths)
- Lamps or Sconces (for table or wall mounting)
- String Lights (for decorative purposes)
- Electrical Wire (in various gauges and colors)
- Switches and Dimmers (for controlling light levels)
- Power Sources (batteries or electrical outlets)
- 2-in x 4-in Lumber (for building custom light fixtures)
- Plywood or MDF (for creating custom lamp bases)
- Decorative Items (such as glass, metal, or wood accents)
Step-by-Step Instructions
- 1. First, let’s start with the basics – gather your materials. You’ll need a few essential items like a string of fairy lights, a mason jar, some decorative twine, and a hot glue gun. Make sure you have a clear workspace and a pair of scissors handy, as we’ll be getting crafty.
- 2. Next, prepare your mason jar by giving it a good clean and dry. This will ensure that any glue or decorations we add later will stick properly. Take a moment to inspect the jar for any chips or cracks, and set it aside for now.
- 3. Now it’s time to get creative with the lighting design. Decide how you want your fairy lights to be arranged inside the jar. You can wrap them around the inside of the jar, create a swirling pattern, or simply place them at the bottom. The choice is yours, so have fun with it.
- 4. With your design in mind, start wrapping the twine around the lid of the mason jar. This will add a rustic touch and help conceal any imperfections. Apply a small amount of hot glue to secure the twine in place, and trim any excess with scissors.
- 5. Carefully place the fairy lights inside the mason jar, following the design you chose earlier. Make sure not to damage the lights or the jar during this process. If needed, use a small amount of glue to hold the lights in place, but be cautious not to overdo it.
- 6. Once the lights are in place, add any decorative elements you like. This could be some artificial flowers, pebbles, or even a small ornament. Get creative and have fun with it, but remember not to overcrowd the jar.
- 7. Finally, seal the deal by screwing the lid back onto the mason jar. Make sure it’s tightened securely, but not too tight, as you don’t want to damage the twine or the lights. Plug in your new DIY lighting project and enjoy the warm, cozy ambiance it brings to your space.
Diy Lighting Projects Unleashed
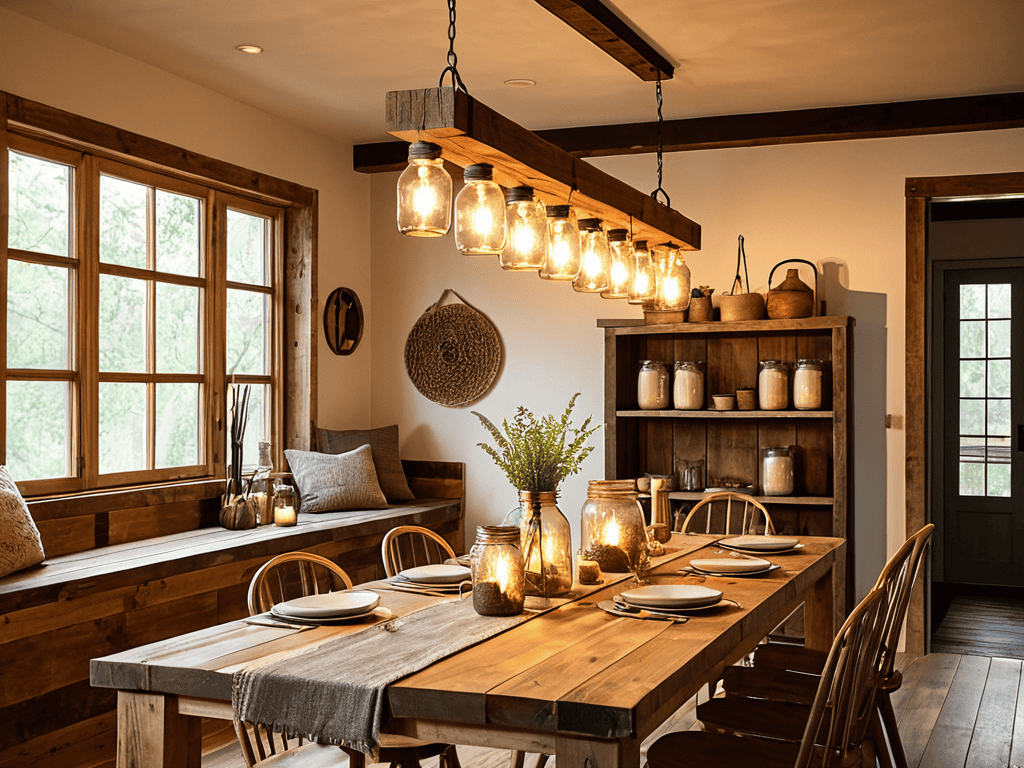
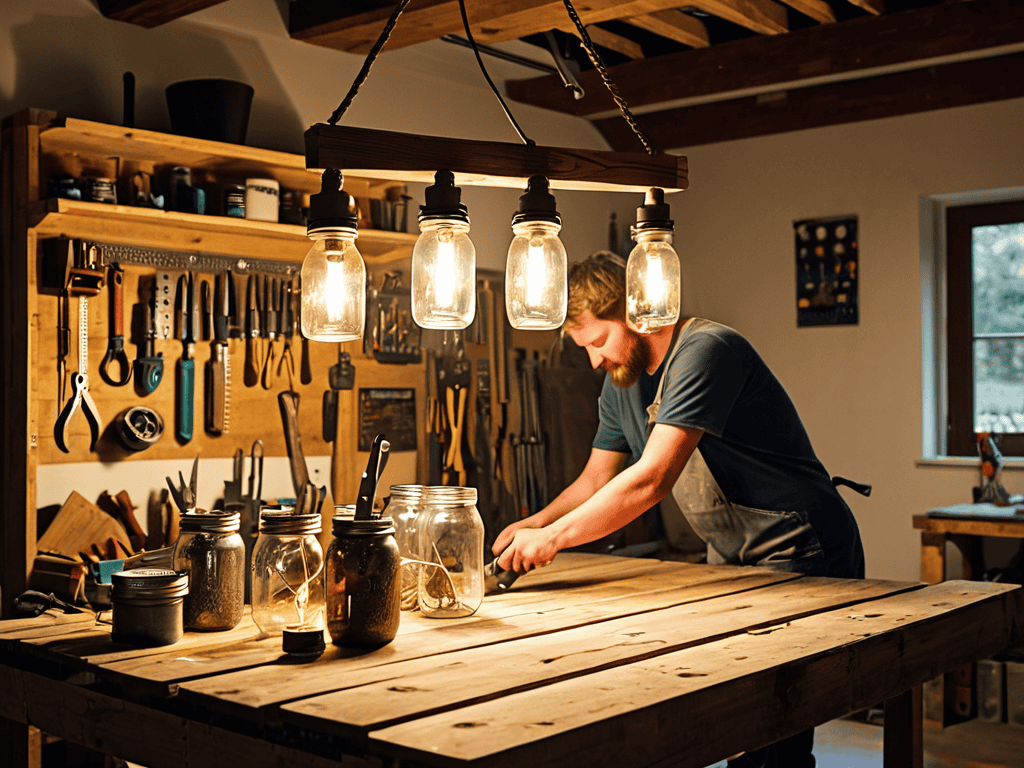
As you dive deeper into the world of DIY lighting, you’ll discover a plethora of upcycled lighting ideas that can add a touch of personality to your space. Consider transforming old mason jars into beautiful pendant lights or creating a unique chandelier from reclaimed wood. These one-of-a-kind fixtures not only reduce waste but also make for great conversation starters. When it comes to installation, a string lights installation can be a simple yet effective way to add ambiance to any room.
To take your lighting game to the next level, explore energy efficient lighting solutions that not only reduce your carbon footprint but also save you money in the long run. LED lighting for homes is a great option, offering a wide range of colors and designs to suit any decor. From modern and sleek to vintage and rustic, the possibilities are endless. By incorporating these eco-friendly options, you’ll be able to enjoy your newly lit space while also doing your part for the environment.
As you experiment with different lighting designs, don’t be afraid to think outside the box and try your hand at outdoor lantern making. This fun and creative project can add a warm and inviting glow to your outdoor spaces, perfect for entertaining or simply relaxing on a warm summer evening. With a little creativity and some basic materials, you can create custom lighting fixtures design that reflects your personal style and enhances the overall ambiance of your home.
Led Lighting for Homes Simplified
LED lighting is a fantastic way to add a modern touch to your space. I love how easy it is to install and customize – you can place strips under furniture, behind TVs, or even create ambient floor lighting. Plus, it’s energy-efficient, which is a bonus for the planet. With a few simple tools and some creativity, you can transform any room into a cozy retreat or a vibrant hub, all with the power of LED lights. Whether you’re a tech-savvy DIYer or a beginner, LED lighting is a great place to start experimenting with DIY lighting projects.
Upcycled Lighting Ideas Shine
Upcycled lighting is where creativity meets sustainability. I love transforming old items into unique light fixtures that add a touch of personality to any room. From mason jars to vintage bottles, the possibilities are endless. With a little imagination, you can turn trash into treasure and create one-of-a-kind lighting pieces that reflect your personal style.
By giving new life to discarded materials, upcycled lighting not only reduces waste but also adds a story to your space. Each piece becomes a conversation starter, showcasing your resourcefulness and flair for design. Whether you’re a seasoned DIY enthusiast or just starting out, upcycled lighting is an exciting way to experiment with different textures, colors, and shapes, making your space truly shine.
Bright Ideas Ahead: 5 Essential Tips for DIY Lighting Success
- Illuminate Your Space with Layers: Don’t rely on a single light source – mix and match different lighting types to create a warm and inviting atmosphere
- Get Creative with Materials: Think beyond traditional lighting fixtures and experiment with unique materials like mason jars, burlap, or reclaimed wood to add a personal touch
- Consider the Color Temperature: Consider the mood and ambiance you want to create and choose light bulbs with a color temperature that fits – warm white for cozy, cool white for energizing
- Play with Proportions: Don’t be afraid to go big or small – oversized lighting fixtures can make a statement, while tiny string lights can add a whimsical touch
- Experiment and Have Fun: DIY lighting is all about trial and error, so don’t be discouraged if your first attempt doesn’t turn out as expected – keep trying and you’ll eventually find your lighting groove
Illuminating Insights: 3 Key Takeaways
I’ve learned that with a little creativity, DIY lighting projects can completely transform a room, making it feel more personalized and inviting
Upcycling old materials into unique lighting fixtures not only reduces waste but also adds a touch of history and character to your space
By simplifying LED lighting concepts, anyone can create stunning, energy-efficient lighting solutions that elevate their home’s ambiance and style
Illuminating Wisdom
DIY lighting projects aren’t just about brightening up a room, they’re about igniting your creativity and making your space a reflection of your soul.
Luna Nightingale
Shining a Light on Your Creativity
As we’ve explored the world of DIY lighting projects, it’s clear that the possibilities are endless. From upcycled lighting ideas that breathe new life into old materials, to the simplicity and efficiency of LED lighting for homes, there’s a project out there for everyone. Whether you’re a seasoned DIY enthusiast or just starting to dip your toes into the world of home improvement, the key takeaway is that DIY lighting projects offer a unique opportunity to add personal touches and character to your space.
So, as you embark on your own DIY lighting journey, remember that the true beauty of these projects lies not just in their functionality, but in the creative freedom they offer. Don’t be afraid to experiment, try new things, and push the boundaries of what’s possible – with a little patience and imagination, you can illuminate your space and make it truly shine.
Frequently Asked Questions
What are some easy and affordable DIY lighting projects for beginners?
I’m all about keeping it simple and stylish. For beginners, I swear by mason jar pendant lights, twine-wrapped string lights, and recycled bottle chandeliers – they’re easy, affordable, and add a warm glow to any room!
How can I ensure my DIY lighting projects are safe and meet electrical standards?
Safety first! When tackling DIY lighting projects, always follow local electrical codes and use certified materials. Double-check your wiring, and consider consulting a pro if you’re unsure – it’s better to be safe than sorry!
What are some creative ways to repurpose old materials for unique DIY lighting fixtures?
I love breathing new life into old stuff. For unique DIY lighting fixtures, try repurposing mason jars, vintage bottles, or even antique lanterns. You can also transform old pallets, wooden crates, or metal pipes into one-of-a-kind light fixtures. Get creative and experiment with different materials to add a personal touch to your space!